Congratulations on deciding to finally jump into the magical world of hydroponic gardening.
You probably feel overwhelmed, though, with all the information out there. Get this, get that, don’t do this, don’t buy this – it’s annoying, we get it.
That’s why we decided to create this comprehensive guide on the fundamentals of building and running a hydroponic system at home.
We will go over the types of hydroponic systems, setting up the essentials such as light, watering, etc., and how to ensure your plants will thrive all year round. Let’s go!
What is the easiest hydroponic system to use?
If you’re a beginner looking to get into hydroponic gardening without a huge upfront investment, we recommend starting with the Kratky or DWC systems.
These are the two easiest systems to start with, and it’s also easy to build a DIY hydroponics garden using either of those.
Types of Hydroponic Systems
With all these systems, we will look at what they comprise without mentioning nutrients or pH kits because these will be standard across all systems.
Kratky System
Difficulty: Beginner
This is one of the simplest methods of hydroponics available and requires no electricity. All you need to set it up is a dark container with a lid, net pots, and your growing media. This hydroponic system is suitable for growing spinach, lettuce, tomatoes, and many other leafy types of vegetables.
In the lid will be the holes where to place your net pots. Once they are filled with your growing media, the young roots will protrude from the bottom of the net pot into the solution. As they absorb nutrients, the level drops and the roots grow. At this point, the space at the top of the container delivers oxygen to the roots.
DWC (Deep Water Culture)
Difficulty: Beginner
A DWC system is very similar to the Kratky system but on a larger scale. This system only requires an aerator pump and can cater to a more significant number of plants. In this system, the water continually bubbles to deliver oxygen to the plant’s root system.
Flood and Drain (Ebb & Flow)
Difficulty: Intermediate
This is one of the most popular hydroponic systems in use, and for a good reason, it can produce some of the best results out of all the systems while being easy to maintain. Here the plants will be grown in any suitable growing media inside pots. These are then spaced in a grow bed which is a little higher around the sides than the containers.
The nutrient reservoir will be a separate unit that is large enough to hold enough nutrient solution to flood the grow bed. In the grow bed, there is an overflow pipe that will stop water from rising above the height of the pots. Next, you will need a water pump which is used at intervals to flood the grow bed, once the timer finishes (15 or 30 minutes at intervals), the water flows back through the pump into the reservoir.
Plants receive enough water and oxygen once the grow bed drains. The addition of air stones will deliver more oxygen to the roots which will result in healthier plants.
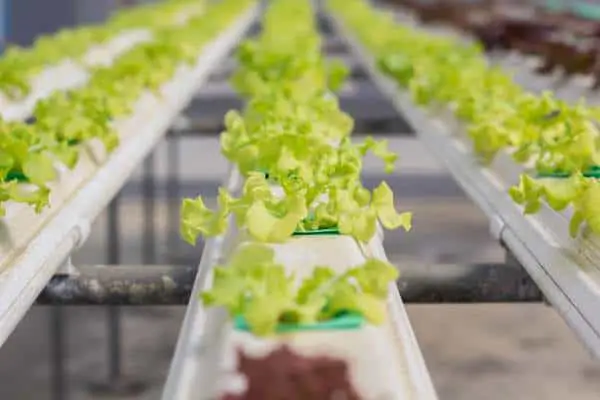
NFT (Nutrient Film Technique)
Difficulty: Advanced
These systems are an all-in-one solution. In most cases they contain large 4-inch PVC pipes that have holes cut into them which will hold your net pots, again these are filled with your growing media, and the roots protrude into the bottom of the pipe.
The reservoir will hold the air pump and air stones, which continually flow down the pipes and return back to the reservoir. Roots are still exposed to the air to receive oxygen so they won’t become overwatered. The weak area of this is when there is a pump failure. Plants can quickly suffer because their growing medium won’t be holding sufficient moisture to maintain the plants for extended periods.
Drip Systems
Difficulty: Intermediate
In this system, each plant will be fed individually. What differs in this kind of system is the plants are drip-fed from above whereas all other systems are fed from below. There is still a separate reservoir that contains both the water pump and aerator stone, and from the pump, there are small diameter tubes that feed the pots on a timed period. The nutrient then drips from the bottom of the pot or container back to the reservoir.
In design, it is very similar to a flood and drain system, but without the flooding aspect.
There is also the aeroponic system. which differs from all of these because a fine mist of nutrients is sprayed onto the roots. These can be much harder to set up, and might not deliver as many plants in your growing space. Additionally, many of these systems are purchased rather than being built.
A Look at Hydroponic Fundamentals
We will now take a look at the fundamentals of hydroponics. These will contain seen before information and will be general across all systems.
There might be problems with one system more than another, but the ways to solve these will be the same. As an example, if you have waterlogged roots, then the solution will be the same regardless of the system. All that differs in hydroponic systems is the nutrient delivery method and the ease of operation.
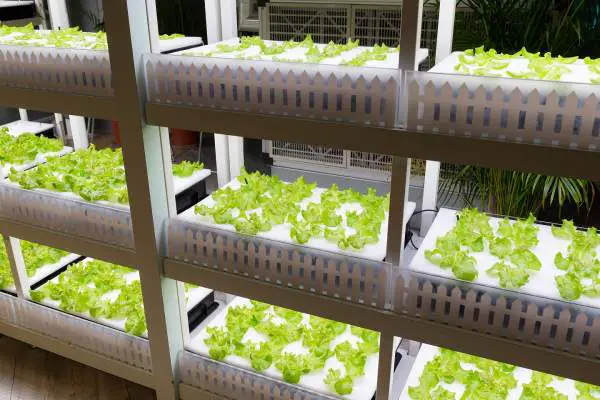
Light
Germination requires very different rules when it comes to growing in a hydroponic system so they will have their own section. But, once plants are transplanted, they do light which is the most essential ingredient for plant growth.
It doesn’t matter if you have your system in an outdoor location, or an indoor grow room, without light, and sufficient amounts of it, your plants won’t survive. The purpose of light is to induce photosynthesis where carbon dioxide and water become converted into plant food and oxygen. So, the more light your plants receive, the faster and more bountiful they will grow.
There is one worthy mention, and that is if growing indoors under artificial light, you can obtain better results than if plants were being grown in a sunny window. This is because you are controlling the amount of light compared to variable light throughout the day.
Sunlight varies throughout the year, so even if your plants are in a warm enough environment, their growth will still change throughout the seasons.
When using grow lights, the one thing you must ensure is plants receive the full spectrum of light. This needs to be from the bluer end of the spectrum all the way to the other where there is an abundance of red light.
When using grow lights, there are countless types and strengths that growers choose. You can choose from fluorescent, LED’s, High-pressure sodium, or metal halide bulbs. All these come with unique benefits and downsides.
What is crucial is that no matter which bulb you use, they all governed by the following three factors:
This is expressed by using a Kelvin scale and will relate to the temperature of the light source. This doesn’t necessarily mean one bulb is hotter than the other to the touch. It is the warmth of light that is measured.
A good example is 6000 Kelvin is recognized as being cool light, and a light source that has a CCT (Kelvin) of 2700 would be considered warm.
Wattage
A grow lights watt usage is how much energy it will use when it is turned on. This also has a relation to how bright it will be because of the electricity running through the element.
A regular light bulb in the home uses about 75 watts. But, in some hydroponic grow rooms, there are lights of 250, 600 up to a 1,000-watt bulb being used. At this level, they will use the same electricity as you’re A/C or other larger electrical device.
The downside to most of these HID lamps is they need changing periodically:
- 24 hours per day – change after 6 months
- 18 hours per day – change after 9 months
- 12 hours per day – change annually
Lumens
This is how much light per square foot that will be emitted by your grow light bulbs. This measure will be dictated by the manufacturer and not the power consumption (wattage). High numbers of lumens equate to high-quality lights. Never opt for a bulb that delivers less than 2,500 lumens. You can also use the 20 – 50 watts calculation for each square foot of your growing area.
With all this, it is fundamental that you provide your plants with at least 14 – 16 hours of good light each day.
Air
There are a few factors that are included under air, these will be humidity, temperature, and carbon dioxide. All these are important for any hydroponic system and can have a severe impact if they are not in the right region, or the correct levels are not met.
Carbon dioxide is produced by every breath we exhale, and to a certain extent, there are levels in the air we breathe in. In outdoor gardens, these levels are controlled without too much intervention, but for an indoor garden, this can be very different.
Air ventilation, rather than only having airflow is crucial because the levels of CO2 might only reach around 400 ppm (parts per million). Levels required should be up to approximately 1,500 ppm, and without supplementing this unnaturally, it will need fresh air to be entering your grow room.
You can see how some growers control this by using grow tents, this reduces the space, so the ppm of CO2 increases. These tents will have an exhaust fan, and a fan on the other side which blows in the fresh air.
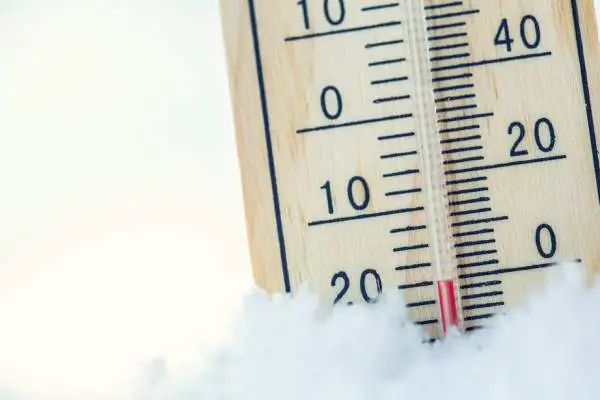
After this, we come to the ambient temperature. This can change depending on your plants. However, almost all plants are unable to survive for too long outside their ideal growing temperatures. This can be either up or down, so growers shouldn’t think just because they are indoors that it doesn’t become too cold.
This is another area that is affected by an influx of fresh air from a ventilation system, and also from any grow lights which are in operation. The ambient temperature of the air does need careful monitoring and adjustment.
The next area affected by the air is humidity. Some plants are very choosy about humidity levels. When humidity is too high, it becomes ideal for mold or algae, and this is especially true in your reservoir. Low humidity on the other end, can stress plants as it struggles to replace moisture.
Water and Hydroponic Nutrients
Every system has different requirements. These can be because of the grower or the plants being grown. Many growers choose already mixed nutrients, and merely adding these in varying quantities is enough for many people.
There is though, an underlying element to this that is fundamental for successful growth which growers should be aware of. Purchasing a bottle of nutrients is straightforward, but knowing what they do is very different.
Knowing how these elements work, it is handy to see how commercial growers use their powdered compounds to achieve their desired results.
NPK is what all growers know they need to follow for maximum growth of their plants. These come in different solutions such as 20-10-5. This means there is 20% Nitrogen, 10% Phosphorous, and 5% Potassium.
When plants reach later growth, they should be receiving lower amounts of N (Nitrogen), this is why some larger-scale commercial growers mix their own, they are in a far better position to control each compound as necessary.
One thing to note here reflects back to the temperature of your grow room. You might need higher amounts of N (Nitrogen) if the temperature is under 80F when your plants are in their vegetative growth phases. If your grow room has a temperature that is higher than this 80F, then you don’t need to adjust the N levels.
There are lots of NPK ratios you can see, but not all will be right for your garden. Here is a guideline that can be used as a starting point:
N (Nitrogen) – 200 – 400, P (Phosphorous) – 200 – 600, and K (Potassium) 200 – 600
On occasion, plants might suffer from magnesium deficiency. The addition of Epsom salts to your water is an easy remedy for this. No matter how you obtain your nutrients, and this can be dry or liquid, the one fundamental thing is to never over-feed your plants. It is much better to slightly underfeed and add rather than trying to reduce nutrient concentration.
When we look at nutrients and water, there is a temperature to consider, and if your mix is too warm, this can lead to bacterial growth. Other areas which need consideration and are fundamental to successful plant growth are:
- EC (Electric Conductivity)
- CF (Conductivity Factor)
- TDS (Total Dissolved Salts)
- pH Levels
When you look at your TDS levels, these are ideal when they fall in the range of 500 – 1000ppm in your solution. When there is a reduction in the ppm plants can take up nutrients easier. This is true in younger plants or seedlings, and once they reach their vegetative growth phase, these levels can be increased to 800 – 900ppm. This will equate to a stronger nutrient solution.
Once plants reach their maturity or flowering phase, these TDS levels can be further increased to 1000ppm – 1100ppm before being reduced in the final phase.
No matter what levels you are using, these TDS levels should be measured along with pH levels on a continual basis. EC meters test the conductivity of your solution and will determine the TDS which is the level of dissolved salts.
We all know pH levels need to be measured on a routine basis. These work in conjunction with the strength of your solution because they will change as you add nutrients, or add new water to your reservoir. Ignoring these or leaving them too long before checking can have a dramatic effect on your plants.
One fundamental factor is to never mix either pH UP, or pH Down into your nutrient mix. The chemical components can produce a chemical reaction. Such is the risk of this, you should only use one dropper for each chemical. Water should be checked adjusted before it is added to your reservoir, this way you can adjust without shocking your plants with a dramatic rise or fall of the pH level.
To make sure your nutrients don’t become too strong, you can top up (top off) your reservoir with half the strength of nutrients to what you first began with. This should be done every other day, and the days in between, you can top up with plain water (pH checked).
Changing Nutrients and Flushing Reservoir
This will be one of the most fundamental things a grower needs to do for their system. But, there are two ways that different growers use to calculate when to do this. One uses a time-based approach, and the second uses a volume-based approach. This is where the above TDS levels come into play.
Here are the two different approaches to doing this:
Time-based
This can be between 10 – 14 days for small hydroponic systems. It required all of your old nutrient mixes to be disposed of and refilled with a new solution. Larger systems can be stretched to one month before changing the solution. Out of the two, this is the recommended way of gauging when to change.
Volume-based flushing
Using the above TDS and EC readings, the time to flush the system is when you have used half the starting amount. According to this method, many people top off their tanks as nutrients are absorbed. This requires continual monitoring, as soon as the top-off amount reaches half of the original starting volume, then it is time to flush the system.
Growing Mediums and Water Quality
A growing medium adds nothing to a hydroponic system in the way of nutrients. There the only function is to deliver support for your plants. There are many options in terms of growing mediums, but gravel and perlite tend to be the most popular ones among hydroponic growers.
Many growing mediums must be thoroughly soaked before use. This is the case for Rockwool when germinating, but also vital when used in a full system. It is crucial to use the best growing medium for the plants you grow and the type of system you are using. A good example is coco coir. In systems that utilize water pumps, the fibers can start blocking the pump, but in DWC or NFT they have less chance of easily being passed around your system.
When using water for your hydroponic system, this needs to be clean, so there are no bacterial elements contained in it. This is why growers use pure or reverse osmosis water. It also means they have a clean slate when it comes to adding their nutrients.
If you see deposit buildups around your faucets, this means you have hard water. If this is the case, it means you have too many minerals. If you use this kind of water and it has a TDS of over 200ppm, you will need to adjust to allow for this difference because it will affect your TDS with nutrients added. Again, this is the reason clean water is used.
We have seen it is crucial to keep your nutrient mix at a certain temperature. However, it should be noted that optimum root growth will happen when your mix is between 70 – 75F, but if you have any root diseases, these grow faster in these conditions.
If you maintain a temperature under 68F, it can go a long way to helping prevent root rot in your plants.
Additionally, it is harder to regulate the temperatures in both DWC and other ‘Bubbler’ systems because there isn’t usually an external reservoir and small water volumes. One other point of note that is very often overlooked is that aquarium pumps can run hot, so they do add heat to your nutrient mix.
Fundamental Do’s and Don’ts for Your Hydroponics System
We know that there are some varieties of plants that don’t grow very well in hydroponic systems. Many root crops are not as successful as leafy vegetables because of the way growing media works compared to soil.
There are as we said many fundamentals which need adhering to, as well as a handful of things you should do, and things you shouldn’t. These can be seen here:
Do’s
- Light exposure to your reservoir should be limited to when you are topping off your solution. All pipes leading to growing beds should be dark to prevent light exposure and every possible way light can seep through your cover should be capped.
- Clean supply and drain lines on a regular basis. This can be every few days depending on the type of system you use.
- Pumps lose efficiency over time, check these to make sure they are pumping as they should. Flood and drain systems especially.
- Clean filters if they begin clogging. Coco coir can cause blockages here.
- If you use reusable growing media, wash it before re-use and allow it to dry.
- Carry out thorough sterilization of media and pots and any other components between growing cycles.
- Sanitize your components and system daily.
- Do always check your pH levels. Even if you use a litmus strip for a quick check, you can quickly see if there are any changes.
Don’ts
- Never use lemon juice
- Never use liquid bleach in your system
- Never add iron while any UV is running. This can lead to chelates being created. Any UV should be turned off until the system has cycled.
- Don’t let your growing media remain wet, this will lead to root rot. Time your cycles, so the growing media is almost dry before the next feeding cycle.
- Never use a water softener to treat hard water. These add salts to the water that are harmful to plants.
- Don’t let your nutrient mix rise above 75F or fall below 50F. You might need an aquarium heater or chiller to compensate. Air stones can be used to help cooling as long as they are using external air.
- Don’t place grow lights too close to your plants. If you have no option, point an oscillating fan to where the hottest areas will be.
Conclusion
As you can see, there are a few things you need to keep an eye on or consider when setting up a hydroponic system. With the basics of your water and nutrients, the effect of lighting, and ventilation, you will cover almost everything.
Some of this will depend on your grow space, and if you have access to external windows or it is sealed off, and you are wholly reliant on grow lights. Once you have these basic fundamentals under control, you are in a position to take on any hydroponic system because the same basic rules will be the same.
Once you learn the basics, you can quickly extend any system or build a larger one from scratch. A lot of the fun is in discovering new tips and techniques, but these fundamentals will never change.
Related Posts