Hydroponic wick systems are one of the easiest hydroponic systems a grower can make and operate. Because of their simplicity, they are the cheapest to set up. These are fantastic for growers who are new to hydroponics, or for veteran growers who have spare space and wish to make full use of the area.
A hydroponic wick system can comprise as few as five individual components; this even includes your plants. Although, you can expand on this a little if you so wish. These systems are super easy to build and use, but there are some things to know along the way.
Here, we will look at all you need to know about constructing and running a hydroponic wick system.
Basics of a Wick System
In the purest form, all you need to build a wick system is a reservoir, your pot and growing medium, some nutrient solution and some wicking material. This can be strips of old clothes, rope or anything else capable of absorbing moisture.
The way these systems work, is by capillary action this you see in everyday life.
Here are a couple of examples of this in action:
- Clothes that draw sweat away from the body.
- Paper towels soaking up spilled liquids.
Plants do exactly the same thing, when their roots absorb moisture through the growing medium.

Capillary action occurs, because by essence, water droplets are sticky, so when they enter thin tubes (or porous materials) they start clinging to the sides of the tubes. Once this happens, something called meniscus occurs. This merely means there is a curved surface on the top edge of the water droplet.
Water droplets cling together through an internal bond of its molecules. This creates surface tension. With the sticky force of the droplet and the walls of the capillary tube, the droplets move upward. However, there are limits of how far this can travel in reality.
When you build a wick system, capillary action goes into action. The wick sucks water and nutrients up from the reservoir to your plants, as they need it.
Pros and Cons of a Wick System
Like any hydroponic system, there are pros and cons to each. Here are the upside and downsides of this simple system.
Pros
- A porous growing medium will increase oxygen absorption by your plants
- A wick system is very easy to understand and to build
- They are the cheapest to build and maintain
- Wick systems can be made from anything and will fit in the smallest of places
- Once running, they require very little maintenance or management
Cons
- Although a wick system can produce great results, yields can be lower than other systems
- Larger plants will require oxygenation of your nutrients
- You will need to change your solution to keep nutrient levels constant
- The likelihood of mold increases because the water is not circulating
One thing that links to the downsides, is plants, which are heavy feeders. These will take up more water, so your EC levels will rise. Not only this but also some large plants may take up water and nutrients faster than your wicks can deliver them to your growing medium.
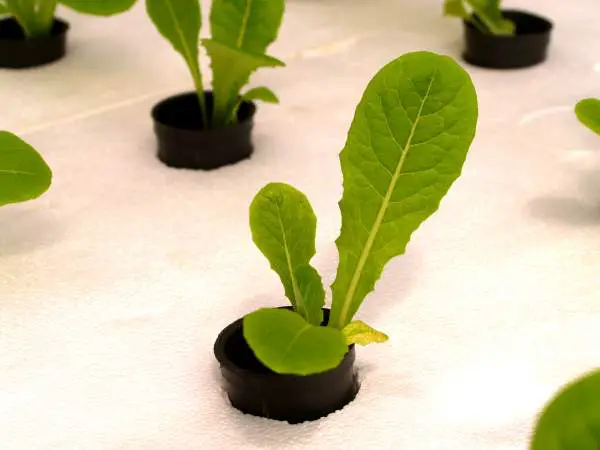
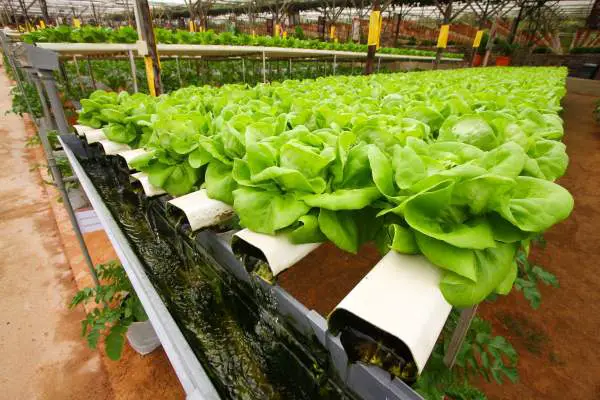
These systems are more suited to lettuce or herb types of plants rather than tomatoes or peppers.
Components of a Hydroponic Wick System
Out of all the components in your wick system, the wick is crucial. The choice of material dictates how fast and how much liquid can travel through it to reach your growing medium.
Because there is a vast number of materials you can use, you can perform a simple test. If you place some food dye in water and then insert your material, you will be able to see how fast and how far it can travel.
This will give you an indication which material serves you the best. One other notable thing is to place two wicks for each planting area if you use larger buckets.
Items required
- A container or bucket for your plant
- A container or bucket for your nutrient tank
- A suitable wicking growing medium. Coco coir, perlite, vermiculite are ideal choices for this system
- Wicking rope or your chosen wicking material (about 2-3ft of 1-inch thick wicking material)
- 3/4 inch drill bit
- Electric drill
- Air pump and air stones – optional
Wicks – when you have your wick, you need to wash them beforehand as this can improve their performance. Depending on your system size, you will possibly require 2 to 4 wicks. The less distance water needs to travel, the better the performance of the wick.
Reservoirs – these can be any size as long as they are big enough to cope with your plants. There is a limit how small, but there is no real upper limit of size. They will require topping up with water so the end of the wick never sits above the water level. The closer the water to the top of your tank the better your wick will perform. Like other hydroponic systems, no light should be able to enter your water tank.
Air pumps – you don’t need the inclusion of an air pump, although, there is nothing wrong with adding one. This will increase oxygen, and it will help prevent nutrients from sinking to the bottom of your tank.
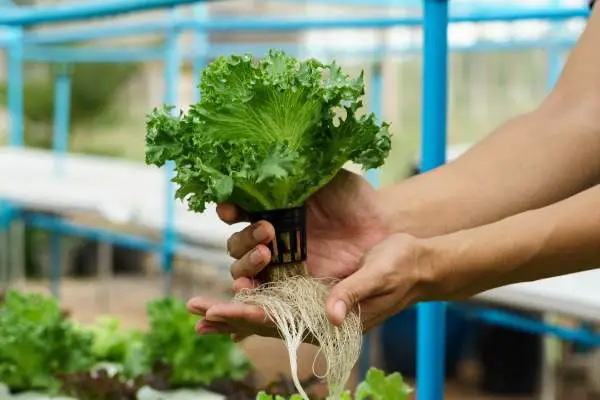
Growing Medium – You will require a growing medium that is capable of holding moisture. It can take some trial and error to find the right combination of wick and medium that work well together. If you find your wick is very efficient in soaking up moisture. You may need to add some larger growing medium like perlite or gravel to your initial growing medium to prevent over watering. Sand, coco coir or vermiculite are ideal mediums to begin with.
Building Your Own Hydroponic Wick System
After looking at the basics of a Wick system, you will see they are easy to build with very few components. With that, we will now go through the building instructions. This will be using a 3-gallon bucket, but you can use any size as long as you have a second container suitable for your reservoir.
Tip: Two buckets of the same size are often used. One sits inside the other and rests against the side of the first, or rests on a brick that you place in your water tank.
Step by Step
- Take your 3-gallon bucket and drill a 3/4 inch hole in the center of the bottom.
- Fill your reservoir with enough nutrient solution so it reaches to just below your growing bucket once it is in place. Reserve one jug of your solution for the final steps.
- Insert your wick through the hole and make sure it is long enough to reach the bottom of the reservoir. You will have around 1 foot inside your pot and 1 to 2 feet inside your reservoir.
- Unravel your wick inside your growing bucket and then fill with your growing medium up to 2/3rds full. (Wicks need to be close to the plants rooting system, and long enough to be covered in solution as levels drop).
- Insert your plant in the bucket and fill the top third of the pot with more growing medium or use Hydroton pebbles.
- You can place your growing bucket inside your reservoir. It is advisable to make sure no light can enter where your nutrients are, because this prevents algae growth.
- Gently top water around your plant with the solution from your jug. This prevents the growing medium from leeching moisture from your plant roots.
If you are using an air pump and air stones, all you need to do is make a small hole in the top edge of your reservoir and feed in the pipes (change clear for black tubing), this will add more oxygen to your water and aid in plant growth.
Maintaining Wick Systems for Optimal Performance
Wick systems require very little maintenance, but they do need some care an attention at some stages. A lot will depend on the size of your wick system to how much maintenance you do need to carry out. However, some of the principles are the same regardless of the size of system.
You may find plant growth slower than other systems. Nonetheless, there are a few things to help your plants along, like adding air stones.
These few pointers can help you get the best plant growth possible from this manual kind of Hydroponic system.
- Use multiple wicks so plants receive optimal amounts of water and nutrients – this will depend on your bucket size. Larger than 3 gallon buckets as in our example can use two wicks.
- Keep water levels as high as possible – the closer the water, the less distance it needs to travel.
- After harvest, be sure to rinse your growing medium and rinse off any salt build up. These levels will increase as your water levels drop. Only add enough nutrients and top off with plain water.
- You will need to measure EC & pH levels using your digital meters.
Conclusion
For some growers, they may think these types of systems are too simplistic and are unable to deliver the results they want. While these systems are simple in design and function, they are more than ideal for squeezing in small areas.
As for not delivering results, a Wick system is more than ideal for delivering great results for the right kinds of plants. This allows growers to free up space in a full system and use this system for plants that require less continual attention. On a last note, there is no other Hydroponic system that is more suited to new growers than these systems. They are the ideal training ground to learn all about hydroponics.
Related Posts
Oscar Stephens
I am a gardening and tech enthusiast! Stumbling across the world of Hydroponic Gardening, Aquaponics, and Aeroponics by accident I've decided to create this website to put all of the best information I can find in one easy to navigate place. I'll continue to add more content as I discover new things!