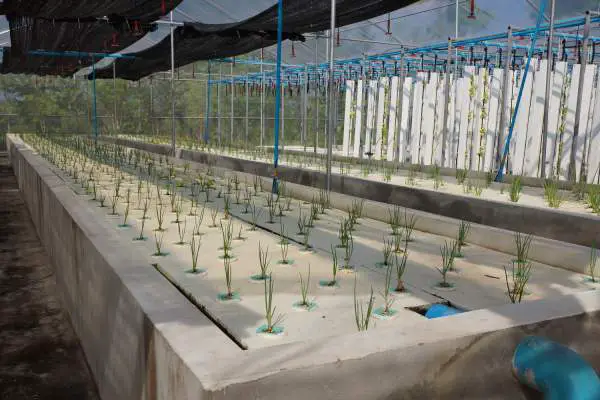
When new growers begin their journey, they often look for a system that is easy to construct, and easy to maintain while still delivering high yields. While the DWC culture system can be the simplest form of the system, there is another that is a little more hands-on, but it can deliver much higher yields.
This system is the Ebb and Flow system and is often called a ‘Flood and Drain’ system. There are many variations of this you can build, but we will concentrate on the main one with a quick mention of another type that is very easy for any grower to set up.
What is Ebb and Flow?
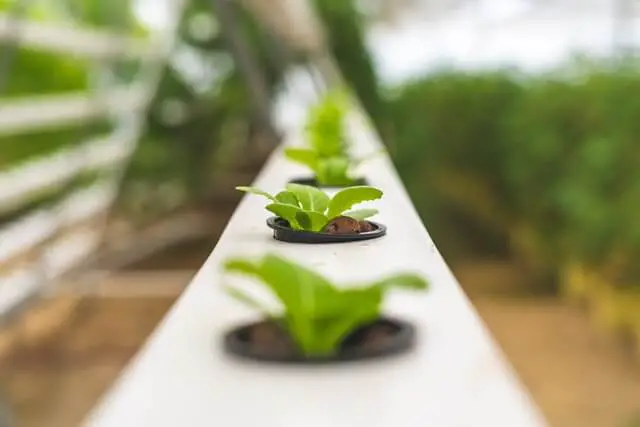
To simplify the process, the ebb and flow system will involve flooding and draining water and nutrients into your growing media. This happens periodically and is taken care of by an electronic timer.
Altogether, two phases make up a full cycle. The flooding phase is when water and nutrients flow into the growing areas. This happens via a submersible water pump. This water level will be high enough to cover the roots of your plants.
Once this has been held in the growing area for a period, the nutrient mix will then be allowed to drain back into your reservoir.
To make sure that water levels don’t keep climbing, and not only swamp your plants, but overspill, the sides of your grow bed, you will have an overflow pipe, that allows excess water to return to the reservoir, as the water is being pumped into the grow bed.
One thing to note with this system is it is very adaptable to your growing space. The flood bed can be any size as long as it is suitable for holding your pots and plants while allowing them plenty of space in between. One other factor for the size will be your grow lights, these need to be sufficient to cover all of the grow bed.
Parts and Materials Required
Before looking at the parts required, it should be mentioned about the flood trays. While these come in different sizes, there is a depth you need to consider. As the flood, the water level needs to rise enough to flood over the roots of your plants, it also requires a couple of inches past this to make sure there is no overspill.
When purchasing, be sure to base your pot sizes on the depth of your flood table. If they are too tall, and the roots of the plants are not toward the bottom of the pot, they won’t be able to take up sufficient amounts of water and nutrients.
- 1 x flood tray of a suitable size – black is the best color.
- 1 x submersible water pump
- 1 x air pump – optional, you don’t need this, but more oxygen is always a good thing.
- 1 x digital or analog timer which covers 24-hours
- 20ft x 1/2 Black tubing – this is way more than you need, but probably the least you can purchase.
- Overflow and inlet fittings – Many growers make their own, but these Ebb & Flow Fitting Kits are super cheap and can make things far more comfortable to work with.
- 1 x reservoir tank – opaque to deter algae growth
When it comes to sizing your water reservoir you need to know the following:
The height you will be flooding the bed too. This will be the tray height (H) x Width (W) x Length (L). For any conversion, use inches rather than feet.
When you have your final number, all you need to do is multiply this by 0.0043, and this will give you a figure in gallons the tank will need to hold.
To put this formula into practice, here is a real-world example.
The flood tray is 36 inches x 72 inches. You will flood the tray to four inches, and the plants will be growing in 6 inches squared Rockwool cubes or the equivalent size in pots.
Reservoir size (gal) = (36 inches x 72 inches x 4 inches) x 0.0043. This will result in a tank size that can hold a minimum of 45 gallons of water.
Note: Depending on the growing medium used, you may need to flood the tank higher. Most of the fitting kits come with an extension to easily allow for this. Also, any flood table over 4ft square will require 3/4 inch fittings. This needs to match your tubing, and also the connector on your water pump.
Assembling a Flood and Drain System
One of the most challenging parts of constructing a flood and drain system is making sure you have a suitable structure to hold your flood tray. Some growers use pond liners and build their own beds, but for new growers, an old table or something similar will suffice.
This should allow the flood table to sit above your nutrient tank. Once you have your support, you can follow these steps to construct the system.
- In the flood tray, drill two 35mm holes in the lowest part of the tray. These should be a few inches apart from each other. They should also be to one end of the tray as they will need to pass the edge of your support.
- Screw both fittings into the flood tray. The rubber seal should be on the inside of your flood tray while the tube fitting end should be sticking from the underside.
- Insert two or three of the Ebb and Flow extensions into one of the pieces you have just fastened to the bottom of your tray.
- Place one of the screen fittings on the top of this. You have now built your tray overflow. (You may need to adjust depending on pot size)
- Place one screen fitting onto the remaining piece that sits at the bottom of the flood tray. This will be your water inlet which is fed from your submersible pump.
- Place the flood tray, so the fittings hang above the hydroponic reservoir.
- You will need to measure tubing from the bottom of your reservoir to the fixing which will hold the tube on your flood tray. One thing to note is there should be a lid on your tank, and you will need to cut holes large enough for both tubes to pass through. Any light into your nutrients can help bacteria grow.
- Connect the tube to your water pump, feed it through the lid and connect it to the inlet fitting.
- Attach a shorter length of the tube onto your overflow, so it sits inside the lid but clears the top of the water. This will help with oxygenation as excess circulates back into your tank.
- Fill your tank with the required amount of water and run the system. Check there are no leaks from either the inlet or the overflow.
- You can then install your timer, and get ready for your pots or Rockwool cubes to be added.
If you wish to use an air pump, be sure to use black tubing, and the hole in your tank lid is small enough to only let the tube through and have no light.
When you are looking for a water pump, it is advisable to wait until you have your flood table. If you opt for a 4 ft. X 4 ft. flood table a 170 GPH(Gallon per hour) pump is suitable. If your flood table is 4 ft. X 8 ft. then a 300 GPH water pump will suffice.
Suitable Growing Mediums for a Flood and Drain System
Because the levels of flooding can vary when you use different growing mediums, it is useful to know which ones you have at your disposal.
- Rockwool – these are suitable when they are in both Rockwool blocks and also when cubes are used in pots.
- Coco Coir – This coco fiber is suitable to be used in both pots or in blocks
- Hydroton clay pebbles – this growing medium is ideal for use in net pots. It should be noted that this won’t hold water as long, so your flood times will be more frequent.
Flood Cycle Times for Different Growing Mediums
Because each growing medium will retain different amounts of water from the flood cycle, these cycles can vary dramatically. Here are estimations of the flood and drain cycle times.
There can be several variables that will shorten or extend these times. Both plant types and environmental conditions can have a significant impact on growing media drying out. These times will be a good starting point for how you will need to set your timer.
Hydroton pebbles
These require frequent flood cycles. Although they don’t hold as much moisture as other growing mediums, they are hugely popular as they give good plant support. The most commonly followed cycles for this growing medium are as follows:
- 15 minutes on – 15 minutes off
- 15 minutes on – 30 minutes off
- 15 minutes on – 45 minutes off
You will need to do some testing to make sure your Hydroton hasn’t totally dried out before the pump timer starts again.
Rockwool
The cycles for Rockwool can range between 3 – 5 hours. For this medium, plant size and the conditions of your growing area will have an effect. The flooding time will most likely be the same 15 minutes, but the time of no nutrients will vary. The best way to tell is to run your system and leave your blocks at hourly intervals. When the block feels light and there is no dripping moisture, then it is time for the next flood cycle. This can change as your plants grow, and they take up more water and nutrients.
Coco
This growing medium can have the most significant variable flood time because of how quickly it dries out. To find out, you need to see how quickly the top 1/2 inch dries. You can easily see this as the material goes from a dark brown when it is saturated, back to a light brown as it dries. If you are using Boss Blocks, then the flood time can be from 3 to 4 hours depending on environmental conditions.
Ebb and Flow Advantages and Disadvantages
Advantages
- Low Cost – This is one of the cheapest systems you can build. There are many parts where you can improvise. Tanks and flood trays can be made from anything which is of a suitable size.
- Easy to construct – Building an Ebb and Flow system is very easy. If you have something to support your flood tray, the hardest part will be the drilling of the holes for your inlet and overflow tubes.
- Plenty of Nutrients – The way the system works makes sure all your plants receive sufficient nutrients and also oxygen. The overflow will prevent too much-standing water, so it isn’t possible for plants to suffocate.
- Ease of use – When the system is running, you have done all the hard work, and all you need to do is maintain your nutrients at the correct levels and give your plants sufficient light.
Disadvantages
Unstable pH levels – if your system fails in any area, or you add too many nutrients/ water, you can find your pH levels fall out of the optimum range. Additionally, if you top off with extra nutrients and the EC levels increase, you can cause nutrient burn, and there will be a buildup of salts in your system.
Breakdowns – the primary point of failure is your water pump. If this fails, you will only have until the next flood cycle is about to commence before plants start to die. Hydroton pebbles will be the fastest to suffer while Rockwool will give you the most amount of time. The manual filling can be a temporary fix, but you will need to replace your pump.
Best Plants to Grow in an Ebb and Flow System
While there are many things you can grow in an ebb and flow system, there are three types of vegetables that do really well. These also come in different varieties, so there is a little choice you can have rather than growing the same.
Cucumbers
There are plenty of cucumber varieties that are ideal for an ebb and flow system:
- Mini cocktail cucumbers – These are harvested when they are around 2-3 inches in length.
- American Slicer type – These fruits are ready to harvest when they are around 7 – 8 inches in length. They are also resistant to disease and are very high-yielding in a hydroponic system.
- Dutch type (seedless) – This type is popular as they deliver the most abundant fruits of around 14 inches in length. They have thin skins, and there is no bitter aftertaste. This variety of cucumber is also resistant to powdery mildew that can affect other varieties.
Related Article:
Lettuce
This is one of the most popular vegetables to grow in any hydroponic system. However, several varieties excel in these conditions. Here are well-proven high-performers.
- Salanova – This variety is one of the new trendy lettuces and is a good way of impressing family and friends. The unique thing with this lettuce is that it grows compact heads that are all uniform in shape and size. You can purchase seeds that offer different colored lettuce, although this variety is a little more expensive.
- Green Butter – This variety of lettuce is ideal for climates like Florida. It is strong enough to fend off downy mildew, and it is slow to bolt. It is a highly-reliable grower and delivers consistent yields.
- Green Frilled – This type of lettuce can be ideal for warmer environments as it is quite heat-tolerant. It delivers plenty of flavor from its medium-sized heads. This variety does grow a little slower than others.
Tomatoes
These may need support as they grow, but an ebb and flow system is ideal for this as everything will be stationary. The best two types of tomatoes to produce are:
- Cherry Tomatoes – There are a couple of varieties of cherry tomatoes (Sakura, Flavorita), so either is ideal for an ebb and flow system. Both types have disease resistance properties while not being prone to cracks or skin splits.
- Beefsteak Tomatoes – Two of the more popular varieties grown in commercial ventures are Geronimo and Trust. These are perfect for growing in an ebb and flow system as they deliver huge fruits, and are disease resistant. These hybrid varieties will require lots of potassium as they begin showing their fruits. These will definitely need support.
Conclusion
Any grower who is looking to get into hydroponics can find all they need in an Ebb and Flow System. They are super easy to build and very cost-effective to run. They also deliver some of the highest yields out of any system.
Almost anything can be grown in this system, and the three vegetables above are purely examples. You can easily mix and match any plants as they are all grown in their own pot of Rockwool blocks. The only hard thing is to make sure your nutrient levels are suitable for all the varieties you wish to grow.
An Ebb and Flow System is so easy to build and cheap to purchase materials for, there is little reason why any grower only needs to keep to one. Two or more of these flood and drain systems allow you to diversify your plant choice, and each can be set up separately.
