If you want to give hydroponic gardening a try but don’t want to spend a ton of money on an expensive system, this article is for you!
Hydroponic gardening systems can vary from a simple diy hydroponic herb garden mason jar to a complex system of DWC buckets. However, many of these complex systems are for more experiences gardeners.
If you need some hydroponic garden ideas to get you started, read about these ten easy DIY plans for beginners. Any of these will get you hooked how fun it is to grow your own food year round!
#1 Mason Jar Hydroponic System

The Mason jar hydroponic system is a straightforward DIY that requires only a few materials and no pump! You can reuse your old mason jars for this project and create your own hydroponic herb garden right in your kitchen.
Materials
- Mason jar
- Net pot
- Clay pebbles
- Black chalk paint
Steps
- Start by painting your mason jars black from the outside to avoid algae growth inside the jar.
- Place your net pot on the mouth of the jar and fill it with water. Allow the base of your net pot to touch the water.
- Fill the bottom of the pot with clay pebbles and add a rock wool seedling on top of the stones. Cover the side of the seedling with more clay pebbles. The clay pebbles absorb the water and nutrient solution, which feeds the plant as needed.
- Place the jar below LED lights.
- Harvest delicious herbs regularly to keep your plants growing!
#2 Desktop Hydroponic System
A desktop hydroponic system is a mini-plan that works efficiently with one plant. You can place it near your desktop on any surface and enjoy your fresh produce.
Materials
- Tiny bucket
- Net cup
- Tube
- Bubbler
- LED lights
Steps
- Start by cutting a tiny hole on the top of your bucket lid. The spot should be snug to discourage the net cup from falling.
- Add nutrient water solution into the bucket and close the lid. Place your net cup and add a tiny seedling.
- Pierce a mini hole on the top of your lid. Push your bubbler tube through the small hole, and you are ready to grow herbs or lettuce.
- Lastly, opt for an LED light to increase the speed of your plant’s growth.
#3 Soda Bottle Hydroponic System
A soda bottle plan is a straightforward and efficient hydroponic system that requires no water pumps or large beds. Additionally, it is cheap to construct, and you do not have to worry about watering this system either.
Materials
- 2-liter soda bottle
- A string
- Drill machine
- Nutrients and clay pebbles
Steps
- Drill a hole at the cap of your bottle and cut it into two parts. The part with the cap should be smaller than the bottom of the bottle.
- Fill the bottom with nutrient solution. Weave the string through the cap and let it sit.
- Invert the small part on top of the bottom so that half the string touches the water while the other half stays in the top position.
- Add nutrient mix, pebbles, and your seed on the top part and let it stay in a warm room. You will notice germination in the plant roots within a few days without advanced engineering later.
#4 Vertical Window Farm
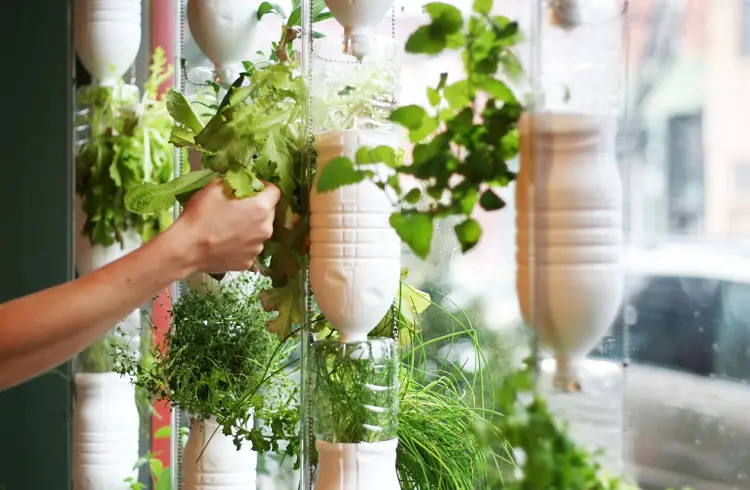
This DIY hydroponic system is excellent for people who have large windows. You can complete the project within an hour and reap the benefits of fresh lettuce for your salads for weeks.
Materials
- Soda bottles
- Drip tubing
- Nutrient reservoir
- Pump
- Chains
- Clay pellets
Steps
- The first step is to get your soda bottles ready. Start by cutting the bottles in half and setting the top part upside down.
- Add your clay pellets and plant in the bottle and drill a tiny hole on the cap of each bottle. Insert small tubing into the lid and let the other end free.
- Attach all the bottles vertically with each tubing’s free end directly pointing towards the plant below.
- Connect your water pump with another drip tubing and place it directly above the bottle at the top.
- Fill the nutrient reservoir with water and watch the pump draw the water from the bucket to the top plant bottle. Once the topmost bottle gets all the water, it drips down to the plants below via the end cap tubings, thus creating a neat hydroponic system that doesn’t require constant watering.
#5 Crystal Hydroponics

Crystal hydroponics uses gel crystal beads to act as a water medium for the efficient growth of plants. This plan is ideal for small-scale use only.
Materials
- A packet of bio gel crystals
- A container or big vase
Steps
- Purchase the gel crystals and put them in the water for a few hours. These crystals will soon absorb all the water and grow twice their size.
- Take a container of your choice and place your plant in the middle. Add more gel crystals to cover the space.
- Your plant will start growing without the need to water now and then. We highly recommend this method for decorating spaces with plants.
#6 Hydroponic Tower
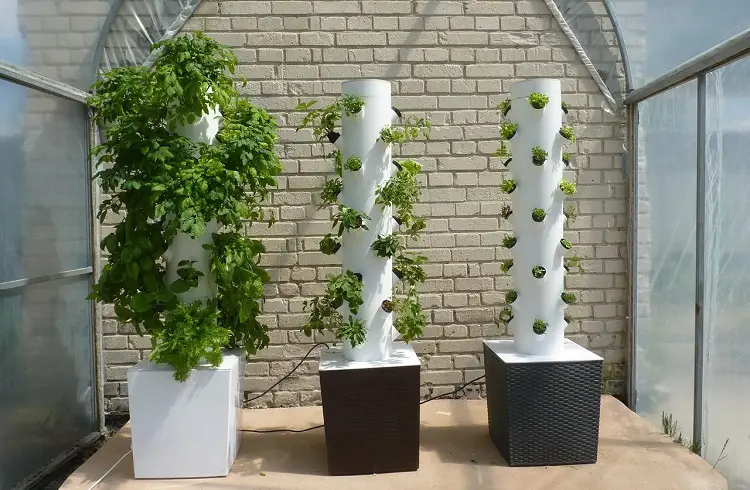
Just as the name suggests, a diy hydroponic tower garden is a vertical arrangement of plastic or fiber pipe to grow your desired plants.
Materials
- Thick PVC pipe
- Thin PVC pipe
- Heat gun
- Net cups
- Bucket
- Water pump
Steps
- You need to warm your thick PVC pipe with a heat gun and puncture holes according to your requirements.
- Connect your water pump with the thin pipe, so it acts as the water carrier. Stick the thin tube inside the bucket and cover it with the thick PVC pipe.
- Cover the top of your thick pipe with a lid to avoid the introduction of algae in your system. The system works as the water travels up and down while watering the pots during its movement.
- Lastly, store your hydroponic tower near a warm place for the ideal growth of the plants.
Related Article: What Size Water Pump Is Best For Hydroponics?
#7 Small NFT Hydroponic Plan
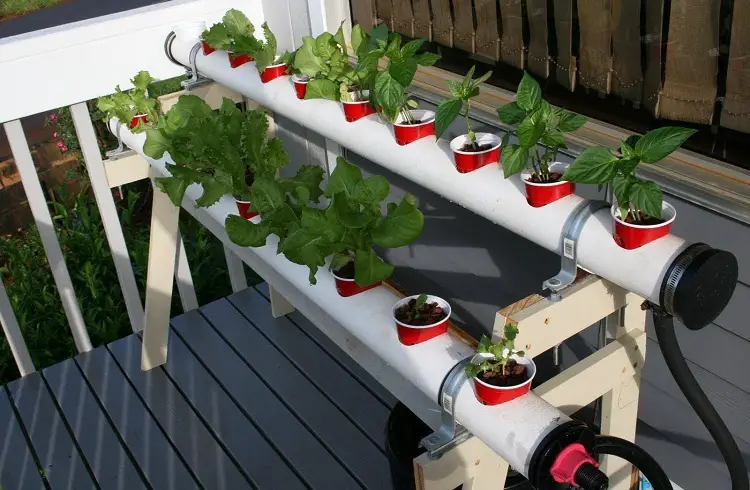
We have a couple of pvc pipe hydroponic garden projects included in this guide.
First, the NFT plan is one of the most efficient systems to grow your plants with ultra-speed. The main aim is to allow the roots to touch the flowing nutrient-rich water for perfect growth.
Materials
- PVC pipes
- Reservoir for nutrients
- Connecting pipes
- Pump
- End caps
- Net cup
Steps
- For an NFT or Nutrient Film Technique, select a long PVC and drill holes for the pots.
- Place this PVC structure at a sloping angle towards the nutrient reservoir.
- Attach the pump to singular connecting pipes. Place these pipes adjacent to the holes so each plant can receive ample water + nutrients.
- The slope allows the water to flow back into the tank. Attach the net pots on the holes and place end cups on the opposite side of the pipes.
#8 Zig-Zag Hydroponic System
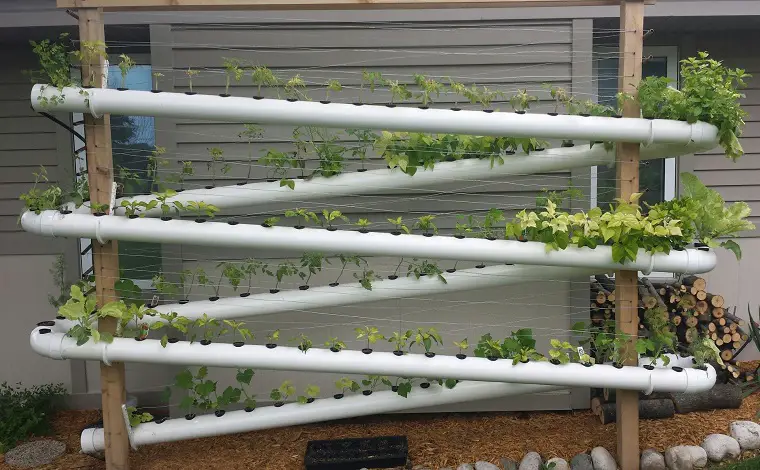
The second pvc pipe hydroponic garden project is this zig-zag hydroponic system. It uses the same principles of NFT but has a different structure to accommodate even more plants for a flourishing garden.
Materials
- 4 PVC pipes
- 8 PVC 90° end caps
- 1 PVC flat cap
- Net cups
- Two pallets
- Nutrient water tank
- Dremel
Steps
- Start by cutting your PVC pipes with holes to accommodate the net cups. Place two palettes parallel to each other. This pallet structure will hold our zig-zag pipes from the sides.
- Attach end caps to all the pipes, so they look zig-zag. Secure your pipe structure in such a way that the water goes down in the nutrient water tank after each run. To do this, place your system at a slight slant and add an extra height at one end.
- Connect your water pump with pipes and join everything to the heightened top. You can even drill holes for each net pot and take mini tubes to add extra water flow.
- Check the system by running the water. The water should ideally run and collect back in the water tank.
#9 The Drip Hydroponic System
The drip hydroponic system resembles a standard watering method without soil or manual hydration.
Materials
- Nutrient reservoir
- Drip system
- Water pump
- Clay pellets
- Small containers
Steps
- Take small containers and drill holes at the bottom for water to pass. Fill the containers with clay pellets and keep them aside.
- Place these small containers on top of your water reservoir tub. Attach your water pump to the drip system.
- Connect the drip system to the small containers to complete the hydroponic system. Ideally, the system should pump the nutrient water from the bucket to the plant containers, and the water can then trickle down through the clay pellets into the reservoir.
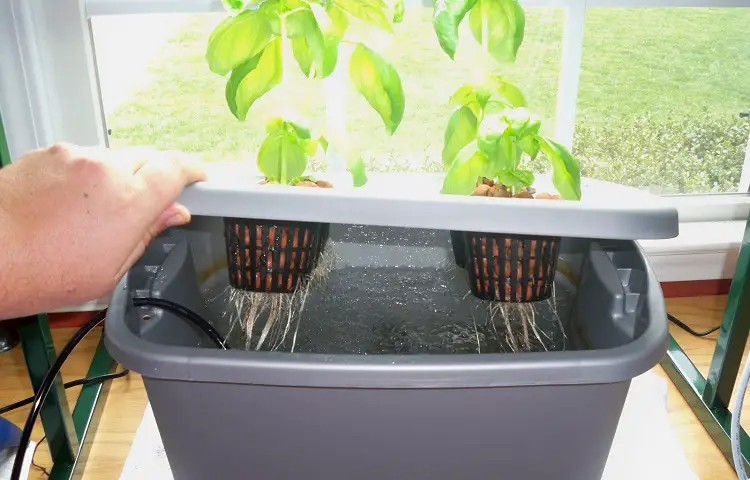
#10 The Ebb And Flow Hydroponic System
The ebb and hydroponic flow system is extremely easy to use and requires minimal materials. This hydroponic plan is excellent for newbie gardeners who wish to learn about soil-less gardening.
Materials
- Water reservoir
- Plastic tub
- Drill machine
- Water pump
- Clay pebbles
- Plant samplings in net cups
- Ebb and flow kit
Steps
- Start drilling the plastic tub according to the size of the ebb and flow kit pipes.
- Attach the kit to the plastic tub and fill the entire tub with clay pebbles. We recommend running the rocks under the water for 10-15 minutes to remove any dirt or excess mud.
- Fill your reservoir with nutrients and attach a water pump to your ebb and flow kit. Since the flow kit is already linked to the plastic tub, it will stay nicely on top of the water reservoir.
- Once you start the motor, the water will wet the clay pebbles while the excess will get drained back into the reservoir.
- Place your net cups into the clay pebbles. A big tub can easily hold 5 6 plants with ample space for each one to grow without any space constraints.
Hydroponic Plans FAQs
What are the disadvantages of hydroponics?
While hydroponics are particularly easy to build and maintain, they do have a few drawbacks that one should consider before making a hydroponic system of their own.
The biggest drawback is the constant electricity requirement, and you need to have a reliable electricity supply to keep the system running. Your crops can suffer if there are frequent power outages.
People feel that aquaponics is a 100% organic growing method, but the introduction of synthetic nutrients doesn’t qualify your product as 100% organic. Since there aren’t many ready-made systems available, creating one from scratch can be expensive.
Similarly, you need to know about hydroponics and construction to make a perfectly reliable system.
Which plants are most profitable in hydroponics?
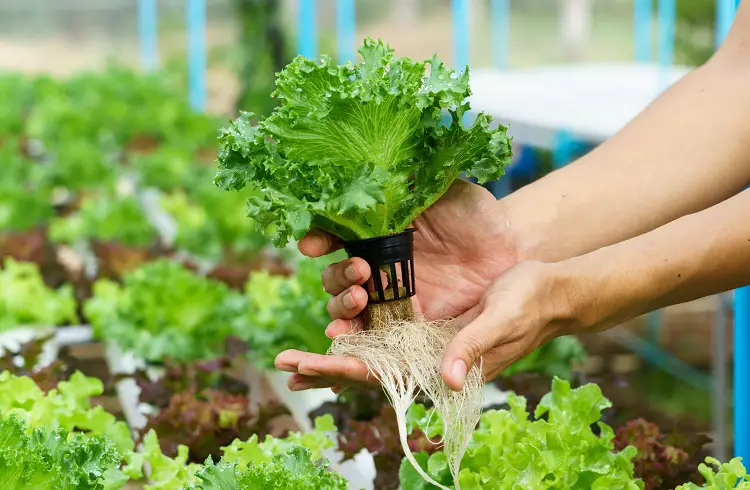
The most profitable plants to grow in a hydroponics system are leafy green, herbs, and lettuces.
Growing lettuce can be highly lucrative, given the proper use of hydroponic systems with large beds. Some other plants, including strawberries, tomatoes, bell pepper, and beans, are ideal for growing via any plan.
You can grow any plant except for tuber crops like potatoes. However, hydroponics is an excellent system to germinate such crops with speed.
How do you plan a hydroponic system?
Creating a hydroponic system can be an easy task but deciding where to start takes time. We recommend pursuing the following points to help plan your strategy.
- Your first step is to decide the type of crops you wish to grow. Make a list of suitable crops for your needs, geographic location, and environment.
- Now that you have decided what to grow, it’s time to choose where to plant. Since most hydroponic systems require considerable space, you need to select a place accordingly.
- Plan for the budget of the entire system and decide on a number that feels accurate to you. According to your budget, select a hydroponic plan that works for the crop your wish to grow. You can refer to our plan list, which includes an exciting range of system options.
- Lighting is another essential part of your planning. All diy indoor hydroponics project require additional lighting. Similarly, ensure that the outdoors isn’t too dark and cold either.
- The final step involves testing the water quality, selecting nutrient mix, and buying all the required materials like a pump, tubing, containers, net cups, etc.
Is it cheaper to grow hydroponically?
From a technical point of view, hydroponic gardening can be cheaper than traditional farming.
You might have to invest in the initial cost of setting up the system, but the diy hydroponic ideas listed above can help lower the initial cost. Once the setup is up and running, you don’t need your expenses are minimal. And you will have higher yields than gardening with soil.
Conclusion
We hope our ten simple and easy DIY hydroponic plans encouraged you to start this journey of soil-less farming.
With these ingenious methods, anyone can quickly build a fully functional system. Lastly, consider vertical gardening if you have a small space, as it is an equally efficient hydroponic plant that takes up less space.
Happy gardening!
Related Posts

Oscar Stephens
I am a gardening and tech enthusiast! Stumbling across the world of Hydroponic Gardening, Aquaponics, and Aeroponics by accident I've decided to create this website to put all of the best information I can find in one easy to navigate place. I'll continue to add more content as I discover new things!