Any grower wants what’s best for their plants. There is nothing better than highly oxygenated water. It helps to deliver more oxygen directly to the roots while keeping all the nutrients mixed correctly rather than settling to the bottom of the reservoir.
It is just as vital for the plants as your system to have clean air stones and in good working order. Nevertheless, over time, these can become clogged for many reasons. For example, when you have an air pump with more than one outlet, one will receive more air than the others will. It is these others that are going to clog over time.
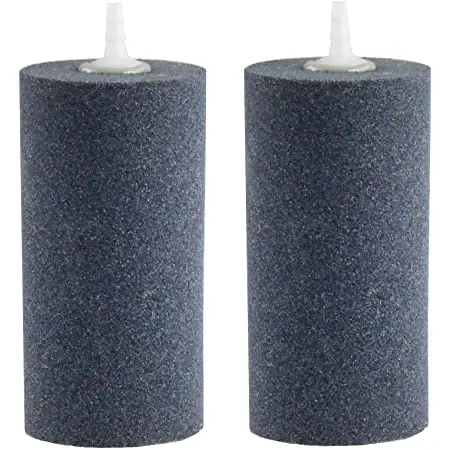
Aquarium air stones are pretty cheap, and many growers replace them, yet many growers don’t have this luxury and want to recycle and clean them. Here we will look at how to clean air stones so that they can perform like new and deliver lots of oxygen-rich water to your plants.
First, we will see why you need air stones and why you need to keep them clean. We will then take a quick look and see when you need to should be cleaning them. We will also take a quick look at a couple of alternative methods to give your air stones a deep clean to ensure there is no excess buildup inside.
Why Should You Use Air Stones in Hydroponics?
Everyone knows that plants need water to survive. They also know they require oxygen, yet in a hydroponics system, the latter factor can be more challenging for plants to achieve without the help of the grower.
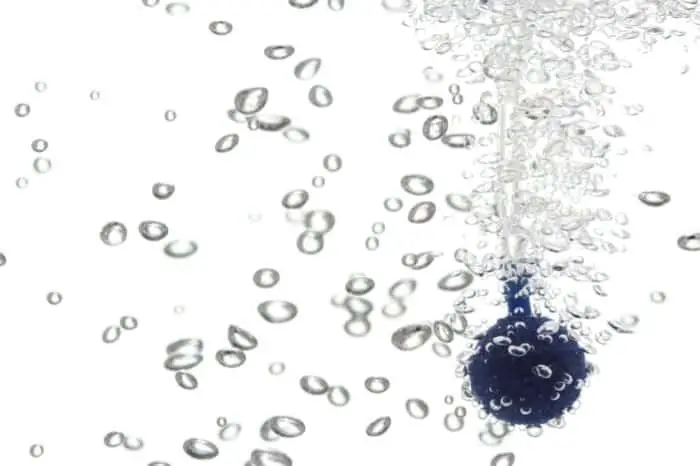
Plants can drown, which will occur easier in hydroponics than in other forms of gardening. Drowning takes place because air stones form thousands of tiny air bubbles. This makes the water oxygen-rich, and although it appears roots are in the water, the ratio of oxygen is high enough to prevent plants from drowning.
While plants can get oxygen from the atmosphere, it is beneficial for them to obtain it directly from the solution. When used with an air pump, an air stone diffuses the air into the water; it is this that oxygenates the water in your hydroponics system, and not the stones themselves
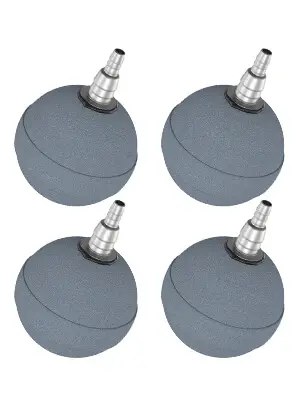
Air diffusers are very similar in function, yet they are often made out of rubber or plastic tubing and can be bent into various shapes. However, in comparison to air stones, they are often larger and more expensive.
There are air pumps that come with multiple outlets. This means air stones have the advantage of flexibility. For example, they can be placed in several reservoir areas so there are no stagnant zones, or you can even send air streams to separate tanks off the same air pump.
Air stones are a relatively simple technology, and all it takes for them to work is to connect them to your air pump (which sits outside your tank) and then flick the switch. It is this less complex hardware that makes them so attractive to growers.
Apart from clogging, nothing can go wrong with an air stone; the only point of failure will be the pump itself. While air diffusers can last longer than air stones, they are not as flexible, such as using them in other tanks, and it may not be possible to clean them to the same extent as you can an air stone.
Also see: Best Air Stones for Hydroponics
Benefits of Cleaning Air Stones
As we saw, many growers never bother cleaning their air stones and would rather buy new ones. This can leave you with a perfectly functioning system, yet you may find that cleaning air stones isn’t just to keep them clean, so they work correctly. There are environmental benefits of cleaning and also cost savings to be made.
Here is a deeper look into why it is a good practice to clean your air stones outside of caring for your plants and system.
- Extend the Lifespan of Air Stones
When you clean and reuse your air stones, you can essentially make their lifespan endless. This is a significant advantage over other forms of aeration, such as diffusers. While this leads to cost savings, it will also mean your initial setup costs are paid for repeatedly when you clean your stones.
- Save on Costs
Air stones are relatively cheap, and nevertheless, if you change them at regular intervals, this recurring cost will add up and make a difference to your cost-effectiveness of hydroponic growing. Aside from this, there may be times when your stones clog outside of a regular cleaning schedule. Changing them without seeing if they can be cleaned is an extra cost you can never recover. - Reduce Waste
Hydroponics, by nature, is sustainable growing, and the discarding of air stones somewhat contradicts what it stands for. Cleaning and reusing your air stones is another step toward helping the environment and not being wasteful
When Should I Clean My Air Stones?
One of the functions of air stones, aside from delivering oxygen to plant roots, is to aid in the prevention of pathogens taking hold. These can make plants sick and will spread through the entire system. In addition, plants, which cannot get the correct uptake of nutrients, produce stress hormones.
Once this happens, they lose the strength to fend off any bacteria and illness and can suffer faster. In a worst-case scenario, your plants cannot just drown from lack of oxygen, but they can die from these pathogens.
Once you know how your air stone performs, you should monitor the performance, and as soon as this lessens, it can be time for the stones to be cleaned. You may find parts of the surface are covered in slime, or if using a growing medium such as coco coir, the fibers have settled and caused a blockage.
Even if your stones appear clean, this buildup can occur inside the tiny pores. Here, they need a thorough clean as there can be a buildup of mineral salts, which won’t wash out without some attention.
Cleaning before you begin a new growth cycle can be the ideal time. Your system will function as it should. It will also mean you are not introducing any bacteria into a clean system.
There is one reason why many growers find they have blocked airstones, and they are unsure of the reason. This can be as simple as air escaping from the plastic connector into the tube. Once this happens, the air is not forced into the stone.
One way to overcome this problem is to add small amounts of silicone sealant around where the connector meets the tube. This will make sure all the air blows through the stones as it should.
5 Simple Steps for Cleaning Hydroponic Air Stones
Cleaning your air stones doesn’t take too much effort, yet one of the best ways to make sure they are clean is to clean them at regular intervals. This means your plants are not likely to suffer before you reach the stage of gunked-up stones.
You can keep them clean and functional with just a few simple steps. This helps eliminate waste and extend their lifespan considerably. Here is a quick summary of the five steps to make sure they are clean.
- Rinse completely and pre-scrub
- Boil for 10 minutes
- Let the airstone soak for a full day in a cleaning solution consisting of 1/3 household bleach and 2/3 water. The diluted bleach will disinfect and clean your airstone at the same time. You can let the stone soak for as long as two days if it looks really bad.
- Remove from solution and rinse
- Allow to completely dry
Air Stone Cleaning Process
When you look at an air stone up close, it comprises thousands of tiny holes. Therefore, it can appear daunting when first thinking of cleaning them. Luckily, this can be easier than it seems without too much manual effort.
Most of the gunk, which accumulates, can be easily removed using the following steps. You can get your stone working like new ready for your next growing cycle with this process. Follow this process, and you can almost eliminate the need to purchase new air stones again.
- Rinse Completely and Pre-Scrub
The first step takes nothing more than letting your air stones soak in clean water. Just disconnect them from the pipes and soak them in freshwater. This will saturate deep into the stones so the water can reach the innermost parts where there are blockages.
Once they are soaked all the way through, you can gently brush them with a soft toothbrush. This is often enough to remove any outer buildup. Be careful not to brush too hard as the stone could easily break. Allow your air stones to air dry before step 2.
- Boil for 10 Minutes
Carefully place your air stones in a saucepan and let them boil on low heat for ten minutes. This will help break up internal gunk and help sterilize the stones simultaneously. Once they are cool enough to handle, remove and let them air dry again.
- Soak in a Cleaning Solution
When dry, you can move on to step three. Take a small container and mix one-part bleach with three parts water (1:3). Your stones need to soak for 24-hours or up to two days, depending on how dirty they appear. Bleach can also help kill any microorganisms that are nestled deep inside and help clean it ready for the next step. - Remove from Solution and Rinse
Because of the use of bleach, this step can be one of the most important. It will need a thorough rinsing to ensure no dirt or traces of bleach remaining. Once you remove it from the bleach solution, you can reconnect one of the air pipes and place it into more clean water. Once you have done this, run it for five minutes in the freshwater. This helps dissolve the final internal buildup, which will quickly work its way out of the stones. - Allow to Completely Air Dry
In the last step, all you need to do is remove the stone from the clean water and let it run for a further five minutes. This helps dislodge any last remnants of buildup in the stone’s pores, and they have a chance to dry before being used thoroughly. After drying with the pump running, remove the pump and let your air stone dry for at least 24 hours. This is crucial if you cycle through several air stones. Putting them in storage while damp can allow mold to grow on them.
A relatively straightforward process, cleaning your air stone can be a great way to extend its life. While it may take some time, it’s worth it to avoid always buying a new one every time the stone begins to lose functionality.
One thing to note is that repeated soaking and drying helps to break up mineral deposits or dirt. This is because, as the stones soak up the next liquid, the dirt is expelled from inside.
Alternative Methods to Cleaning Hydroponics Air Stones
While being the best way to clean your hydroponic air stones, this is far from the only way to do it. Many hydroponic growers who elect to clean their stones instead of replacing them with new ones may opt for alternative methods. A lot of this can be because of bleach in the cleaning process. Here are some bleach-free alternatives.
- Soak your stones in hydrogen peroxide overnight. Once you do this, remove them from the solution and blow air through until completely dry.
- Some growers add their stones to clean water and several denture-cleaning tablets. A common method is an overnight soak and then a good rinse before blowing them out with air to dry. The effervescent action and the ingredient of sodium hypochlorite bleach are safer than chlorine-based bleach.
- Soaking in water and vinegar can effectively break down slat buildup, namely calcium lime deposits. You may often see this in hard water regions. This method can be included in the five steps above in case you are in one of these areas.
- Rinsing and gentle scrubbing can be enough if just the outer part of the stones is dirty. However, this won’t kill any bacteria.
One thing that is often overlooked when cleaning air stones is the plastic tubing that connects them to the pump. While these are not fully submerged, a part of them will be. This part that sits between the water and the top of the reservoir can be an ideal breeding ground for bacteria.
With this in mind, it is worth using one of the above soaking methods to clean these tubes before giving them a thorough rinse and drying them. In addition, any clear plastic tubes that allow daylight in can help algae form, so not clearing this at the same time can be a source of pathogens being passed to your sterile system.
If any algae form on the inside and break free once you begin running your air pump, all your cleaning efforts will be in vain as it will quickly block from the inner core rather than the outside.
Baking Air Stones in Ovens or Microwaves
While researching cleaning air stones, you may see some individuals recommend baking them in an oven or placing them in a microwave. Unfortunately, neither of these options is a recommended way to clean your air stones because you will damage them and not clean them effectively.
Air stones come with small plastic couplings, which connect them to the air pipe. If you attempt to put these in an oven, there is no way they can withstand the heat. Once these effects begin to melt, it will render an air stone useless. So, by doing this, you will need to discard it because of attempting to clean it in a method that isn’t suitable.
Conclusion
There is more to cleaning air stones than saving money. Plant health is the primary consideration, and the more you clean your stones, the healthier and more abundant your plants will grow.
It will be an exercise that is well worth the endeavor, as you will see better growth, which doesn’t cost you anything. That is one thing that no hydroponic growers would miss the chance of being able to achieve.
Related Posts