Any grower who either has a hydroponic system or is considering one will see that nutrient mixes are expensive. This leads many growers to make their own. Fortunately, this sounds much harder than it is in practice.
Before even mixing a single drop, you will need to understand the basics of what goes into these nutrients and how each component works. This is because there are many compounds in a hydroponic nutrient solution, and these need to be made available to your plants at various stages of their growth.
While not for a complete novice to try, it is possible, and you can save plenty of money on nutrients. All you need is plenty of preparation and some attention to detail.
Here, we will look at what goes into nutrients that allows them to work, and some of the best homemade recipes you can find for replacing bought nutrients and also for additional fertilizer and growth enhancers.
Basics of Mixing Hydroponic Nutrients
In essence, a plant doesn’t care where it gets its nutrients from, be it man-made, organic, or something you produce in your home. All they care about is that they receive all they need to grow to their full potential.
When grown in soil, plants can be picky and absorb what they want, but in a hydroponic system, it is up to the grower to make sure all these nutrients are available in the correct quantities.
Every single plant requires macronutrients and micronutrients to flourish. However, the required ratios of these will be very different depending on the types of plants you are growing. There are many differences in these homemade formulas, so making one batch of one type may deliver a different ratio to your next one.

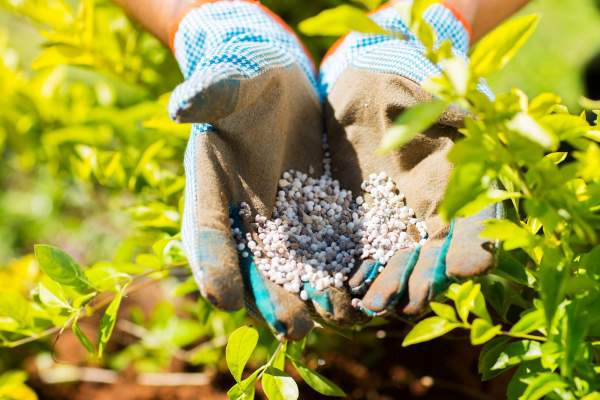
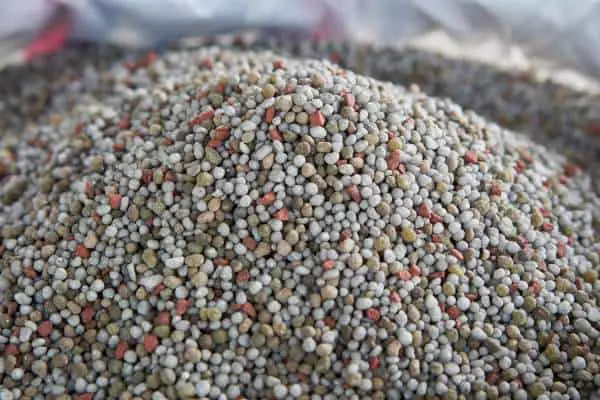
You can make a hydroponic nutrient solution from nutrient salts. These can be easier to make because you can fine-tune your mixture depending on the weight of salts you add. If using these, you must keep these salts cool and dry, as any moisture absorbed will affect their weight.
Many hydroponic nutrient solutions come in either 2 or 3 part bottles. So when making your own using some of the following methods, you make either a batch of two or three nutrient solutions.
In addition to the ingredients, you will need measuring spoons, a good set of weighing scales, and rubber gloves for the crystalline chemicals in some of the formulas.
Finally, purchased nutrients often come with added pH buffers. Because you are making your own, you will need a digital pH-measuring pen and pH Up and pH Down solution. While measuring your pH levels, you might find that your EC levels will be out of sync. So another device you will need is an EC measuring meter.
6 Best DIY Hydroponic Nutrient Recipes
Hydroponic Nutrient Mix Formula #1
This is a one-part mix, which has been proven to deliver good results. However, you will need to keep an eye on your plants to make sure they show no signs of deficiencies or nutrient burn.
This formula is sufficient for a 5-gallon container of nutrient solution. One thing to note is this formula is intended for non-circulating systems, as they are no longer diluted before adding. This makes them ideal for small systems where you have your roots sitting in the solution such as DWC or raft systems.
If you wish to use this in a circulating system, you will need to scale up the quantities until you have enough solution to fill your tank.
- Masterblend Tomato 4-18-38: 10 g (Check the price here)
- Calcium Nitrate 15.5-0-0: 10 g (Check the price here)
- Epsom Salt: 5 g (Check the price here)
This can be one of the easiest to make and takes very little time. Depending on your plants, this nutrient solution will need to be disposed of when you harvest as the salt/EC levels will increase. If there are any signs of deficiency, you can use one of the later supplementary formulas to deliver some extra nutrition.
Hydroponic Nutrient Mix Formula #2
This DIY hydroponic nutrient mix needs a few more compounds than the first, but it is still very easy to mix. Once mixed, you just add 10 grams of the liquid for each gallon of water you have in your tank.
- Potassium nitrate: 255g
- Calcium Phosphate: 198g
- Magnesium Sulfate: 170g
- Powdered Ammonium Sulfate: 43g
- Monocalcium Phosphate: 113g
- Iron Sulfate: 1/2 teaspoon
Mix your dry ingredients together to form a powder, you can then add 10g of this nutrient powder per gallon of nutrient-rich water required. This dry mix is highly concentrated and can cause skin irritation so wear goggles and suitable protective clothes.
All your pH levels and EC levels will need checking after addition. For tomato growers, you can add some of the ‘Farmers Friend Recipe’ or the ‘Gift from the Sea’ mix to deliver a well-balanced set of nutrients.
Hydroponic Nutrient Mix Formula #3 – Compost Tea Recipe
This is the first homemade nutrient mix that can be classed as organic. It takes a little more effort than others take, but if you have spare space, then it can really give your plants a growth boost.
The first thing you will need is a compost heap or even better a composting bin. These should be outdoors in case there are any fumes.
- When making a compost heap, you should be looking at using half-green waste and half-brown waste. Green waste includes grass cuttings, green leaves, food waste from the kitchen. The brown waste side includes straw or hay, dead leaves, old papers (not shiny magazine paper), wood chippings.
- When you have your heap, turn this every few weeks so all the materials can break down and the bacteria will do its work.
- When your compost is ready, all you need to do is add two large shovels full to a large 5-gallon bucket. Fill this with water and let it steep for three days.
- If you have access to aquarium water all the better, if not try to avoid any chemically treated water. Rainwater is also a good option so begin harvesting when it rains.
- Once your mixture has been soaking for three days, all you need to do is pour out the liquid and strain it to remove all traces of your compost sediment. This sediment can be added back on your compost heap.
- When it comes to using this liquid, you need to use 1/2 a gallon for every 50 gallons of water in your tank.
While this is good enough to use on its own, you can also add some of the next two recipes or some of the homemade fertilizer or growth booster.
Hydroponic Nutrient Formula #4 – The Farmers Friend
By all accounts, a traditional farmer who began his foray into hydroponics created this. With his knowledge, he came up with the following formula that has been well proven while retaining organic elements.
- Seed meal: 4 lbs.
- Agricultural lime: 1lb and finely ground
- Gypsum: 1lb
- Dolomitic lime: 1lb
- Bone meal: 1lb
- Kelp (Seaweed): 1lb – you can use dried, just make sure it is not roasted.
To mix, all you need to do is add the ingredients into 5 gallons of water. Mix these until you have a thin consistency. Not all the ingredients may dissolve, so filtering before using is recommended.
When it comes to using this nutrient mix, all you need is to add 6-fluid ounces for every 100 gallons of water in your tank.
This mixture is ideal for large systems, so you might need to scale it back to fit a smaller system so you have enough made to use, and not left standing.
Hydroponic Nutrient Formula #5 Gift From the Sea
This can be used as a base recipe, and for a boost, you can add one of the growth enhancers or liquid fertilizers. If you see any signs of deficiency, even the addition of these in small increments to your system can give a good boost in plant growth.
- Seaweed (Kelp): 6oz
- Epsom Salts: 5 teaspoons – 1 teaspoon per gallon of water
This formula is super easy to make.
- All you need to do is take your seaweed, wrap it in cheesecloth, and tie it with twine. This prevents sediment settling in your water.
- Add 5 gallons of water into a bucket and add your seaweed bag.
- Leave this sitting in the sun for 5 days
- Add the 5 teaspoons of Epsom salts
Either you can add the entire contents into your hydroponic tank, or you can add it in one-gallon increments.
Like all nutrient mixes, you do need to measure your EC and pH levels to be on the safe side. This is even more crucial if you add any of the growth enhancers during your plant’s growth.
Hydroponic Nutrient Formula #6
The nutrients here make up a three-part general-purpose nutrient mix that covers the vegetative phase, the flowering phase, and the third for fruiting. There is also a fourth part, which is added a combined compound rather than individual elements.
These formulas are good for one gallon of each nutrient, so if you plan to scale up, you will need to adjust the quantities accordingly.
Vegetative Stage Nutrient Formulation
- 6.00 grams – Ca (NO3) 2: Calcium Nitrate
- 2.42 grams – MgSO4 * 7H2O: Magnesium Sulfate
- 2.09 grams – KNO3: Potassium Nitrate
- 1.39 grams – KH2PO4: Monopotassium Phosphate
- 0.46 grams – K2SO4: Sulfate of Potash
- 0.40 grams – 7% Fe Chelated Trace Elements – see below
Flowering Stage Nutrient Formula
- 4.10 grams – Ca (NO3) 2: Calcium Nitrate
- 2.40 grams – MgSO4 * 7H2O: Magnesium Sulfate
- 2.80 grams – KNO3: Potassium Nitrate
- 1.39 grams – KH2PO4: Monopotassium Phosphate
- 0.46 grams – K2SO4: Sulfate of Potash
- 0.40 grams – 7% Fe Chelated Trace Elements – see below
Fruiting Stage Nutrient Formula
- 8.00 grams – Ca (NO3) 2: Calcium Nitrate
- 2.80 grams – KNO3: Potassium Nitrate
- 2.40 grams – MgSO4 * 7H2O: Magnesium Sulfate
- 1.70 grams – K2SO4: Sulfate of Potash
- 1.39 grams – KH2PO4: Monopotassium Phosphate
- 0.40 grams – 7% Fe Chelated Trace Elements – see below
Chelated Trace Elements
- 7.00% Iron (Fe)
- 2.00% Manganese (Mn)
- 1.30% Boron (B)
- 0.40% Zinc (Zn)
- 0.10% Copper (Cu)
- 0.06% Molybdenum (Mo)
These trace elements need to be added together and mixed to a fine powder in a mortar and pestle before you can add them to your first three mixtures.
How to Mix Your Nutrients
If you are mixing the three mixes in one go, you will need enough containers for each solution. These should be filled with warm water for the number of gallons you are making.
- Test your waters pH and the TDS/ PPM before you follow the next steps. Your pH levels will change once you add your compounds. Keep your readings, as you need to find the real concentration after your final reading.
- With your measured out salts for each compound, add these one at a time and allow each one to dissolve before adding the next.
- Once you have added all your salts, let it stand until it cools fully. This will be around 2-hours.
- Once it has cooled, test your pH again and compare it against your initial reading.
- Adjust with pH UP or Down until it’s in the correct range for your plants.
These mixtures should be made, so they can be added to your reservoir once they have been cooled. You need to take a second EC reading, as you will need to dilute these mixtures before adding them to your tank. This formula is based on the one given by Keith Roberto who is the author of many Hydroponic books.
It may appear complicated with the number of compounds and maybe something to try once you have more experience in mixing.
Homemade Fertilizers and Growth Boosters
While the above nutrients go a long way to delivering all your plants need, they may lack in some areas at some time. This is more the case for the ones, which are readily available to make from simple ingredients.
It isn’t possible to get the same strength each time, so the following additional fertilizers can supplement these to give your plants a much-needed boost.
All the following are very easy to produce and will help your plants grow to their full potential.
Egg Shell Calcium Deficiency Fertilizer
Once made, the solution you get from this preparation is fantastic to deliver extra calcium to plants. All you need to do is finely crush six to eight eggshells in a pestle and mortar.
Add this powder to 1 1/2 liters of water and a few drops of diluted hydrochloric acid (wear gloves). Leave this for 24-hours and then filter the water to remove all traces of the shells. Be sure to test your resulting liquid to make sure the pH is around 5.0.
This can be used and mixed with any other fertilizer, which is rich in nitrogen during the growth stage of your plants. If you use it in the flowering phase, then add it to a fertilizer, which is high in potassium and phosphorus.
You can use this at any time, but be sure to test your pH levels after you have added it to your tank.
Banana Tea Potassium Booster
Potassium is used in every stage of a plant’s development. Bananas are known to contain the most potassium out of any natural product. Even with the earlier formulations, you can see how important potassium is as it is one of the key NPK compounds.
Potassium helps your plants use the sugars, starches, and carbs they absorb. It aids in building up energy reserves, which leads to the building of complex carbs that give plants their structure to stems and leaves.
Banana tea can also deliver crucial amino acids that will be taken up by your plants. To make this, you only need to boil three or four banana skins in a liter of water. To this, you can add a little sugar or molasses, which is recommended. After boiling, let the solution cool and remove the skins.
You can use this in the flowering stage of your plants’ growth and you should receive around an extra 20% growth depending on your plant type.
Ground Coffee Growth Enhancer
Although you won’t be using the coffee ground themselves, you can use them to make tea, which is a fantastic addition during the growth stages of your plants. One of the primary reasons the resulting tea is so beneficial is it is slightly acidic, and the acetic bacteria which develop in the waste coffee grounds contain 2% nitrogen (NPK) and plenty of other organic nutrients.
There are two ways you can use these. The first is to add them to your composting bin to add the benefits into the resulting liquid, or you can take the easier route and let the coffee grounds soak in water for 24-hours. You can use the resulting water to add to your tank, and the waste coffee grounds, which you can then add to your compost bin.
Brewer’s Yeast Multipurpose Fertilizer
Brewer’s yeast benefits are boasted for humans, but it can also be fantastic as a multipurpose fertilizer for plants. One thing to be cautious of is you use brewer’s yeast and not baking yeast because the two are very different.
To prepare this, all you need to do is add one small spoon of yeast into a liter of water. Once this dissolves over a short period, it turns into a potassium and phosphorus-rich natural fertilizer. This can be one of the simplest fertilizers to produce, and it can give a great helping hand to plants that need a little boost.
Bean Tea
Beans and lentils are rich in Auxins. This helps with root growth as well as for leaves and stems to search out light. In practice, this is what makes your plants grow taller as they try to reach your grow lights.
These auxins have been used for years in a gel to aid root development for seedlings and cuttings. While these were synthetic, they can be found as easily in organic products. Certain beans and lentils are rich in these and a bean or lentil tea that can extract these is very easy to prepare.
Soak your beans in water until they are fully hydrated. You can lightly heat to help extract the compounds.
Once soaked, whisk or blend them until you have a fine paste
Strain the paste until you have a water nutrition-rich liquid that contains many auxins. This is ideal for cuttings or roots to promote growth.
Tweaking of Homemade Nutrient Mixes
Because plants are not in the soil, they absorb all they need through the minute hairs on the ends of the roots. In theory, it makes it impossible to overfeed your plants when they are grown in a hydroponic system.
Nevertheless, when mixtures are in a too high a concentration of nutrients. Your plants will not be able to absorb sufficient water.
The salts need to be diluted, and if your mixture has too high a concentration, your plant will start shedding water instead of absorbing it. This results in your plants dehydrating themselves as the salts suck the moisture from your plants.
When you begin tweaking formulas, you need to do this with some restraint and caution. If you get it wrong, you can destroy your entire crop.
Here are some of the more common symptoms of nutrient deficiencies in your hydroponic plants.
- Lack of nitrogen: This produces stunted plants that have large root systems. The leaves will be smaller and a light color. Growth will be slow.
- Lack of phosphorus: This leads to stunted plants that have dark, dull and leaves that are discolored. Stems will be unusually hard, and they will have a poor root system. You will also see very little branching off.
- Lack of potassium: Older leaves will yellowing and curl. The new leaves droop, as they get larger. Flowers will be lackluster, and the plant stems will be soft and not able to offer full support.
- Lack of calcium: This causes roots to under develop, and you will have curled leaf edges.
- Lack of manganese: This results in weak growth and poor blooming.
Using Homemade Nutrient Mixes
All the above nutrients can be a cost-effective way of adding nutrients to your hydroponic system. However, you will need to pay close attention to your plants when you begin using them.
Unless you are using the formulas, which use powdered compounds, you will end up with a different strength each time. This can leave your plants deficient in some areas, but this may be rare. The powdered formulas can lead to nutrient burn if you add too much, so these are the ones you need to pay close attention to.
The other downside of purchasing the powdered elements is the size of bags they often come in. These can last for a long time, and they will need to be kept as dry as possible. Any moisture can quickly ruin a sack of these minerals and turn them into a large solid block.
On the other side, you have the organic homemade ones, and the ‘Gift from the sea’ especially. This may give off a strong odor if it stands for extended periods.
This being said, you can save a small fortune by making your own hydroponic nutrients, and each time you make them, you will learn a little more about how to make them, and use them more effectively.
Two of the most crucial things you need to watch out for is salt build-up. You will see this in some systems as the compounds will begin crystallizing on the sides of your pots or on your growing medium. When you flush the system, you need to make sure everything is as clean as possible before re-filling your tank.
The last thing to be wary of is sediment in the solution. This may not be apparent when you first add your nutrients to your tank, but over time, these will be drawn toward your pump in a circulating system.
To prevent clogged pumps, you can purchase cheap water pump bags that will keep your pump clean without blocking any water flow.
Conclusion
Making your own nutrients can be fun as well as beneficial. As mentioned right at the beginning, your plants don’t care from where they get their nutrients. As long as they receive all they need, they will be happy and grow to their full potential.
All of these formulas can deliver bountiful yields once you understand your plant types and what nutrients they are seeking.
While some are intended as an all-in-one nutrient mix, this means you may need to add something extra in the flowering stages. One of the growth enhancers can help in this stage so you have the best crops and harvests without buying bottles of nutrients.

Oscar Stephens
I am a gardening and tech enthusiast! Stumbling across the world of Hydroponic Gardening, Aquaponics, and Aeroponics by accident I've decided to create this website to put all of the best information I can find in one easy to navigate place. I'll continue to add more content as I discover new things!