Today our kids are flooded with technology and it can be hard to get them interested in some good old-fashioned gardening. Thankfully there’s a way to garden that can be as technical as it is timeless: hydroponics. Hydroponics, at its heart, is simply using water to deliver nutrients to plants rather than soil.
It doesn’t have to be the commercial-scale hydroponic gardens that you see on news reports, nor does it need to be a complex system with artificial lighting and running pumps (although you can do that too). The other really cool thing is that there isn’t any age, space, or resource limit on what you can do with hydroponics for kids.
Here we’ll go over everything you need to know about hydroponics for kids of any age. The activities listed do come with recommendations for age, assistance, materials, and complexity, but feel free to tweak them however you like. One of the most fun parts of hydroponics for kids is that it allows them to observe and innovate.
Why is hydroponics for kids a great thing?
We could fill a library with reasons that hydroponics for kids is a great thing. But in the interest of getting to the fun stuff, we’ll just talk about the best reasons.
They’re getting a piece of the past, and future
Let’s be honest, hydroponics is the future of crop growth. That alone is a good enough reason to get a kid interested, but it has a deep historical past in human civilizations too. When you do a hydroponic project with your child, you get the opportunity to introduce important historical innovations with them. Being able to show them hydroponics is a way to help kids engage in history.
If their interest really sparks, they can continue their education about hydroponics and translate it into a valuable future career. The field of hydroponics is rapidly expanding, a lot like computers at their onset. While the first computer engineers may have been considered unusual or eccentric, they’re some of the top earners in today’s world. Hydroponics is becoming a similar phenomenon (with the exception of the eccentric engineer archetype, of course!).
You’re giving them a valuable life skill
Hydroponic systems provide an incredibly valuable asset to people all around the world. Hydroponic systems don’t need to be expensive or complicated to successfully produce food. Knowing where your food comes from is more important than most people give credit for, too. By helping your kid to understand hydroponics, they can see how plants grow up close, and they’ll be able to see how plants develop to produce their fruits or flowers.
Beyond creating a deeper understanding of botanical growth, they’ll be learning simple systems that they can use to grow their own food. Our society isn’t one in which where much of the population grows their own food. That being said, for humans as a species being able to produce our own sustenance is hands down one of the greatest assets and skills any individual can cultivate.
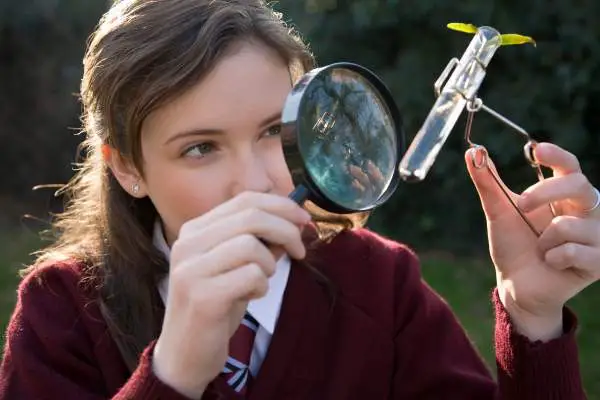
Kids can get a close up look at the science
Watching plants grow is actually pretty fascinating for kids, but they can lose patience when they have to wait to see progress. When they’re growing plants in soil, the wait is especially hard for two main reasons: until plants sprout, there’s a lot of weight while they look at a patch of soil. Next, soil-grown plants grow much slower than plants grown hydroponically.
When kids get to grow hydroponic plants they still get to see the plants in progress while they wait for the plants to grow bigger. They get to see the seeds sprouting from the very start, and they can watch the root systems expand without the visual shield that soil creates. This also helps them understand the importance of root systems, which often gets passed over with the excitement of the rest of the plant.
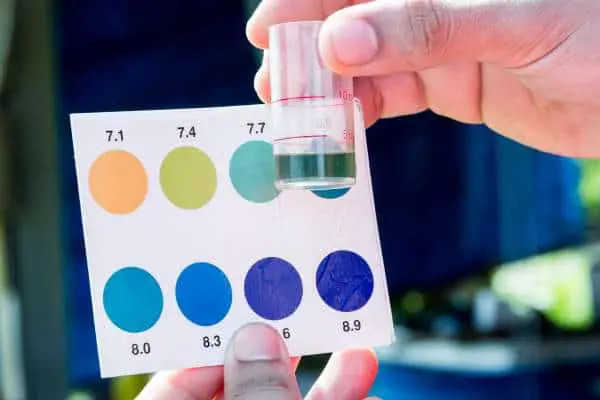
Monitoring the plants, checking nutrient and pH levels, are all parts of the scientific process of observation. When they’re observing something they had a large part in creating, kids are way more engaged than if they were just taking notes on what a specimen someone else grew looks like.
Here are the basics of what you need to know before you get started:
First, as we talked about, hydroponics is growing plants in water culture, rather than soil. So it’s important to explain how plants receive nutrients, how we can provide those without soil, and what the water needs to do to get nutrients to the plants.
So here’s your cheat sheet:
Plants absorb nutrients through their roots. When they’re in the ground, the plant roots absorb nutrients and minerals by sucking up moisture from the soil. The soil, in turn, provides the nutrients that the plant gets from that moisture. That’s why dry soil doesn’t grow plants (with a few exceptions of course, like cacti that use very minimal moisture), and that’s also why even very well-watered soil won’t grow plants if there is no usable nutrient content.
In a hydroponic system, you don’t use soil (that would otherwise be responsible for providing nutrients), so you have to add plant food to the water. The plant roots absorb the water just as they do in soil, but they get more out of it. To add the plant food, you’ll have to add a special ‘nutrient solution’ that’s meant for growing plants in water. Depending on the kind of system you use, the water travels to the water in slightly different ways. Generally, though, the water is delivered to the roots through the system at certain times, almost like a very frequent, very small rain cycle.
Next, there are passive and active water delivery methods
Water is delivered to plants in either passive or active means. Active systems use some kind of powered equipment (even a simple pump) to deliver water and nutrients. Passive systems rely on absorption, gravity, or placement to get water to the plants.
Passive systems are easier for younger kids to work with, but both are pretty simple and equally fascinating.
What kinds of things do you need to start a hydroponic system with your kid?
Another reason introducing kids to hydroponics is so great is because it’s incredibly cheap (and if you’ve got the supplies around the house, it’s free), and supplies are easy to obtain. Really, a lot of the components you’ll need can literally be found right in your recycle bin, right now.
We’ll take about specific systems you can build with kids, and the specific things those will need, but there are some things you’ll need regardless of your system type.
You need something to serve as a water reservoir. This can be a plastic tub, an old fish tank, or even recycled plastic bottles. You’ll also need to make a growing tray that will hold your plants steady and elevate them about your water reservoir. Plastic cartons, styrofoam egg trays, microwave meal trays, and just about anything flat and appropriately sized will work.
Next, you’ll need seeds or saplings. Seeds still sprout faster when you’re growing them hydroponically, but kids are impatient. So here’s a tip that will change how you germinate seeds:
Put a few seeds in a damp paper towel and fold a few times. You want to end up with a rectangle about ¼ to ⅓ of the size of the paper towel before folding. Then put your folded paper towel into a sandwich bag and set it aside. After as little as a day you can see roots emerging from the seeds. After a couple of days, you’ll see chutes and even leaves (but you want to remove them ASAP if you see this starting).
Just be careful not to leave the seeds in too long, or their roots will tangle and weave into the paper towel.
Here’s a rundown on the best kinds of hydroponic systems to introduce kids to:
Yes, hydroponic systems all work on the basis of water doing the work. With that understood, there are still different system types. Here’s a rundown on the best types of systems to introduce kids to:
Wick
Wick systems are passive systems, so you don’t have to worry about powering it (with kids, easy is awesome). Basically, a wick system has plants held in a growing tray (held in place with a growing medium) situated above your water reservoir. A super-absorbent ‘wick’ (or cord or rope) reaches from into the water and up into the growing medium in the tray. The plants then absorb the nutrients from the moisture in the growing medium.
DWC (Deep Water Culture)
Deep Water Culture systems are another great system to introduce kids to. While they do require more equipment and a bit more maintenance, they’re still much lower maintenance than other systems. DWC systems have plants suspended above a water reservoir, usually in a board (or you can use styrofoam, plastic, etc), while the roots hang below and into the water. The most common setup uses net pots to hold each plant’s roots together. The nutrient solution is added to the water, and the roots absorb it directly.
With this system, you will need to provide some kind of aeration to the water.
Cool learning point:
Without sufficient aeration (i.e. oxygen in the water) plants can actually ‘drown’ in water.
To prevent your plants from suffocating or drowning you need to add an air pump or air stone to your reservoir. In much smaller systems like the ones kids will make, you won’t need a large expensive pump.
Other system types
Wick and DWC systems are the easiest for kids to operate and understand. In the interest of providing a complete guide, however, let’s take a look at the other common hydroponic systems:
NFT (Nutrient Film Technique)
Nutrient Film Technique systems don’t submerge roots entirely, instead, they continuously provide a light flow (or ‘film’) of nutrient solution (water with nutrients added) over roots. Plants are placed above a grow tray where roots lay in shallow channels. The tray is placed at a slight angle, and nutrient solution is pumped through the channels to flow over the roots. Once the solution has reached the other end of the tray, it flows back into the water reservoir.
Drip
Drip systems pump water from a reservoir to tubes that are placed near each plant. The tubes have holes placed near the roots of the plants that provide drips of water at periodic intervals. The plants sit in a growing tray with a medium to stabilize them. A pump moves water from the reservoir, up through the tubes, and into the grow tray. Usually, a timer is connected to the pump to establish a watering cycle.
Ebb and Flow
Ebb and Flow systems also use a water pump and timer. Basically, the plants sit in a grow tray above the water reservoir, and like with drip systems a timer regulates when the pump begins the water cycle. When the water is pumped to the plants, the grow tray is flooded (to a certain point) and then gradually drains back into the reservoir.
Projects to teach kids about hydroponics
The beauty of teaching kids about hydroponics is that it’s so easy to demonstrate. Most kids learn better when they get a hands-on experience, so hydroponics is a great way to teach them about plants.
Here are some hydroponic projects you can do with your child:
Wick system for kids
Suitable for ages: Preschool and up
Assistance needed: minimal
Difficulty: very easy
Materials needed: minimal
Cost: minimal to nil
This project is super easy, and best of all, it requires basically no maintenance. You’re just setting up a very simple wick-type system. It’s better to do this project to grow 1 to 3 plants, at the most. Here’s how to set it up:
Gather your materials:
- A tray to use for your growing tray
- Watertight container for your water reservoir
- Growing medium
- Seeds or saplings
- Nutrients (plant food)
- Wick, aka cotton based absorbent fiber (clothesline works well for this)
Prep:
Start your seeds using the tip above (with damp paper towels).
If you’re using a plastic tray or bin for your growing tray, you’ll need to drill several small holes in the bottom. One hole for every 2-3 inches should be enough. If your child is using a Styrofoam tray, they’ll be able to poke holes into the bottom themselves.
Measure and cut the lengths of the string for your wick. Cut a section for each hole in the bottom of your tray. When you measure, make sure the string is long enough to reach several inches into the water reservoir and up through the holes in the tray with a couple of inches to spare. When in doubt, cut longer.
Steps:
- String the wick through the holes in the tray. For kids, it’s helpful to knot the wick with an inch or two of extra string in the tray.
- Fill the tray with your growing medium, and very lightly push it into place where needed.
- Fill your water reservoir with water and add your nutrient solution (plant food or fertilizer).
- Place the growing tray above the reservoir and make sure it’s sitting securely.
- Last, place your germinated seeds in the growing medium once they’re ready. Try to place the plants at least 2-3 inches apart, just like you did with the holes for the wick.
That’s it! Make sure you’re monitoring your plants, and that they’re staying healthy. This system really requires hardly any maintenance. When the water levels get lower, top off the water level.
What are the best kinds of plants to grow in this system?
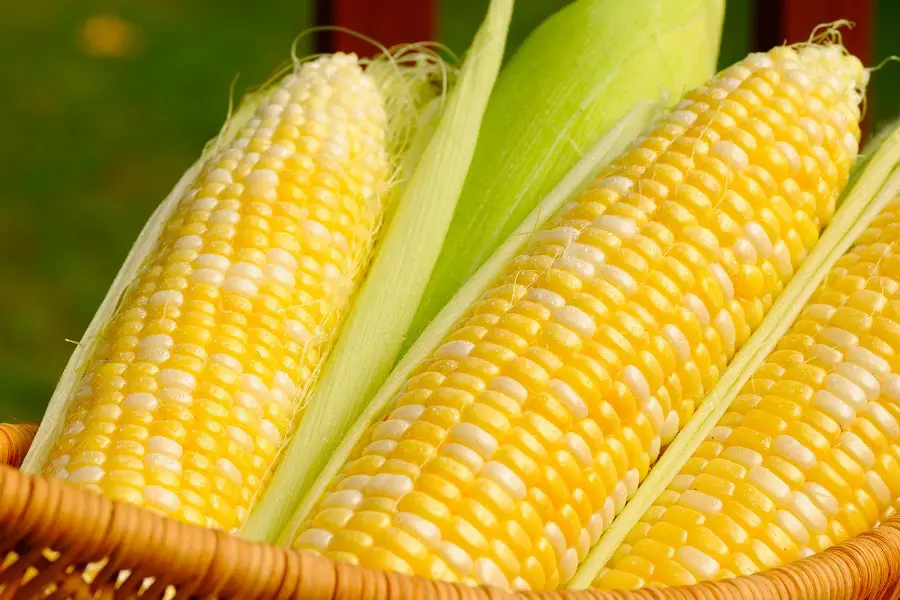
The best kinds of plants to grow in wick systems are blessedly also some of the fastest-growing (which is a boost to the excitement for kids). Greens, like lettuce and herbs (think basil, rosemary, thyme, spinach, etc) are the best suited for wick systems.
Deep Water Culture (DWC) system for kids
Suitable for ages: 8+ (with moderate to ample assistance), 12+ (with minimal assistance)
Assistance needed: minimal to ample depending on age
Difficulty: moderate
Materials needed: moderate
Cost: up to $35 (much less if recycled materials are used)
This system isn’t too hard for kids, but depending on their age they’ll need different levels of assistance. Since some electric parts are involved, you’ll need to take care of those steps for your kid (and educate them about electrical safety). You can grow a few plants in this system, depending on the size. Here’s what you do to get this DWC system working:
Gather your materials:
- Water reservoir (or plastic bin, tank, etc)
- Board, tray, or Styrofoam slab (it should fit securely over the water container)
- Netted pots
- Seeds or saplings
- Small aquarium pump and tubing
- Airstone (easily found at pet stores in the fish section)
- Plant food
- Growing medium
Prep:
Start seeds or saplings, as referred to above.
If using a board or plastic tray, drill holes large enough to fit the netted pots through. If you’re using a softer plastic or Styrofoam this step is much easier.
Steps:
- Fill the netted pots with your growing medium (⅔ full is a good guideline), preferably over old newspapers or plastics bags to reduce mess
- Fill your water reservoir with water and an appropriate amount of nutrient solution.
- Attach your airstone to one end of the tubing for the pump. Then attach the other end of the tubing to the pump (this should slip in easily to a specific circular port). Do not power on the pump yet
- Place the airstone in the water reservoir (in the bottom and as near to the center as possible). Most air stones come with suction cups that you can use to secure the airstone once you’ve positioned it
- Once the airstone is placed, turn on the pump and ensure it’s working. You should see a steady stream of bubbles coming from the airstone. (Note: if the pump seems overpowered, or the airstone shifts despite being secured, valves with dial pressure adjustment are also available in the pet store for a couple bucks)
- Place your tray or board above the water reservoir
- Place your netted pots into the holes you cut into the board during the prep stage
- Make sure that the water level is high enough to saturate the netted pots. If it isn’t, add more water
- Once everything else is set up, you can add your plants to the netted pots
Once you’ve finished, you don’t have much maintenance to worry about. The nutrients will need to be replenished about every 2 to 3 weeks, and the water supply should be topped off when it visibly lowers. If the area you place the plants in isn’t very sunny, you can add supplemental lighting. If you’re in this situation, you can get one or two inexpensive LED growing lights and leave them on the plants during the day.
Note: If you do have to add extra lighting, make sure the lights are far enough from the plants that the plants don’t get dried, burned, or withered. Also make sure the lighting fixture isn’t going to get too hot throughout the day, as that can be a safety concern.
What kinds of plants can be grown in this DWC system?
Lettuce and herbs are an old favorite, but DWC systems give you more options. Yes, mint and basil are popular and quick-growing, but older kids especially might like to see more ‘fruits’ of their labor. With proper support (like stakes or small lattice planks), you can grow tomatoes, okra, and even peppers that produce decent-sized harvests.
Tips on materials for your system
Making a hydroponic system with your kid is a great way to spark their creativity by allowing them to find and gather materials with you. Items like the water reservoir and grow trays are often easier to find improvised materials for. Some other things might require a little more footwork on your part, so here are a few tips to make it as easy as possible:
Use dollar store seed and seedling/sapling starter mixes: the bags are usually labeled “Bulb and Seed Starter,” or “Starter Potting Mix” (or something of that variety). The point is, they usually contain a mix of vermiculite and perlite (so check the label just to be sure). The best part is that you get at least 12 to 16 oz of growing medium or more, for a dollar and tax.
Questions kids ask
Kids ask a lot of questions, and it’s no fun for anyone when you don’t have a solid answer. So just to get you a head start, here are some common questions that kids pop up with when you’re creating a hydroponic system (and an answer cheat sheet for you):
If we use growing mediums, isn’t that the same as planting them in the dirt?
While it looks similar, it’s pretty different. First, soil provides plants with nutrients. Growing medium does not (for older kids: it’s chemically inert, meaning it is inactive and does affect the chemistry and sustenance of plants). The growing medium is basically there to hold plants in place and allow them to absorb moisture from the nutrient solution.
What’s the difference between the water and the nutrient solution?
Once you add the plant food (aka nutrients) to the water in your water tank (or reservoir), nothing. When you add the plant food to your water tank, it’s called often called a nutrient solution.
Can we grow a tree inside now too?!
While neither of the systems we went over could grow a tree, larger hydroponic systems can. That being said, it would have to be a very large system, and a very small dwarf tree (these trees are smaller versions).
Can we put fish in here too?
Aquaponic systems do have fish in them. These hydroponic systems can’t support fish life if you’re adding chemical plant food. In an aquaponic system, you don’t add chemicals because the fish waste provides the plant food.
Are the plants drinking through the wick?
Kind of, but not really. The wick soaks up water, which the growing medium then soaks up from being close to, and touch the wick. The plant roots just absorb the moisture that’s pulled in by the growing medium.
Can we eat the plants?
As long as you’ve planted edible plants, yes. Since the plants don’t come into contact with chemicals, they’re especially healthy.
What’s the point? Plants grow in dirt, too.
There are a lot of ‘points’ of hydroponics. First, you can grow a lot more plants (food especially) for a lot less money. Growing plants in the dirt also takes up a lot of space and water. With hydroponics, you actually don’t use nearly as much water or space, so it’s good for the environment.
How long does it take?
It depends on the plants you decided to grow, but after germinating them most plants should have a decent amount of growth in 3-8 weeks (when you’ll be able to harvest them).
Related Posts
Oscar Stephens
I am a gardening and tech enthusiast! Stumbling across the world of Hydroponic Gardening, Aquaponics, and Aeroponics by accident I've decided to create this website to put all of the best information I can find in one easy to navigate place. I'll continue to add more content as I discover new things!